Pirate 4x4 banner

Warn xd9000i Rebuild

1 reading
35K views 26 replies 7 participants last post by  dangerz  
#1 · (Edited)
Someone told me to share this here so here we go. I picked up a pretty beat up Warn xd9000i for cheap a month ago with the intent of rebuilding it. It ended up being a bit more than I was hoping for, but it was still a lot of fun. I broke up the posts on my build thread into sections that I'll just paste here to share. Also I guess I can only post 10 images at a time and I tried to take a lot of pics, so I'll just split those posts up.

Part 1a, Initial Major Cleaning 11/18/12
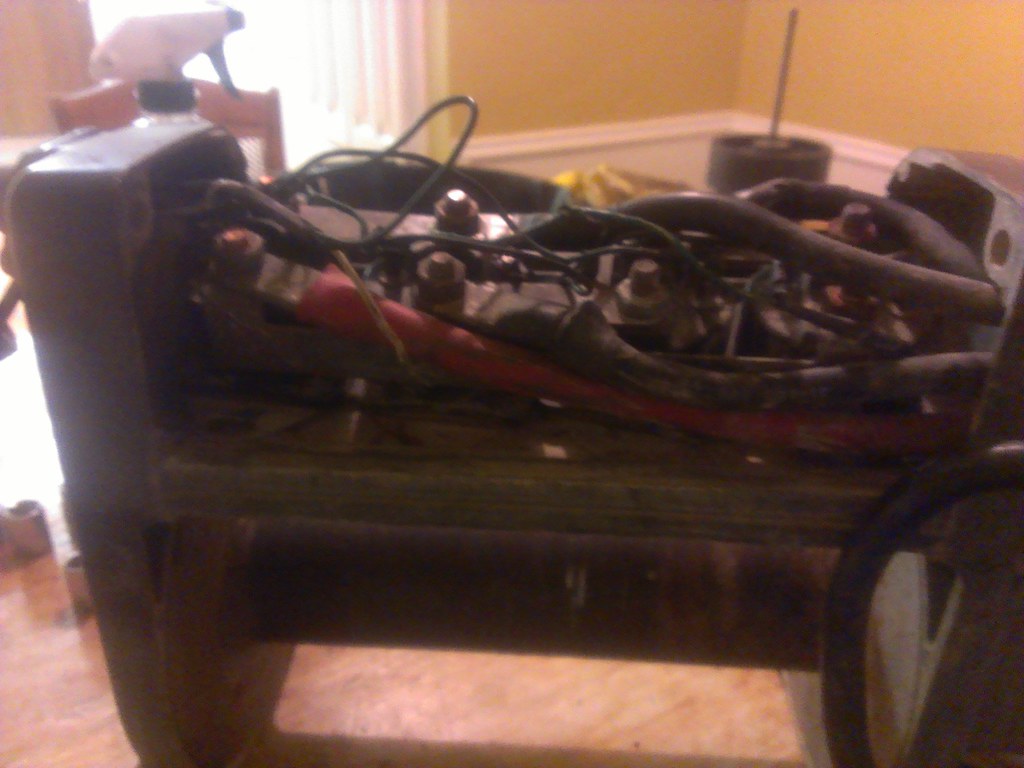
Did a lot of work on the winch today. I'm waiting on a response from Warn. My serial number is lower than the ones they list on their website. Not sure what that means, but hopefully they email me back next week.

So here's what I started with.

Image

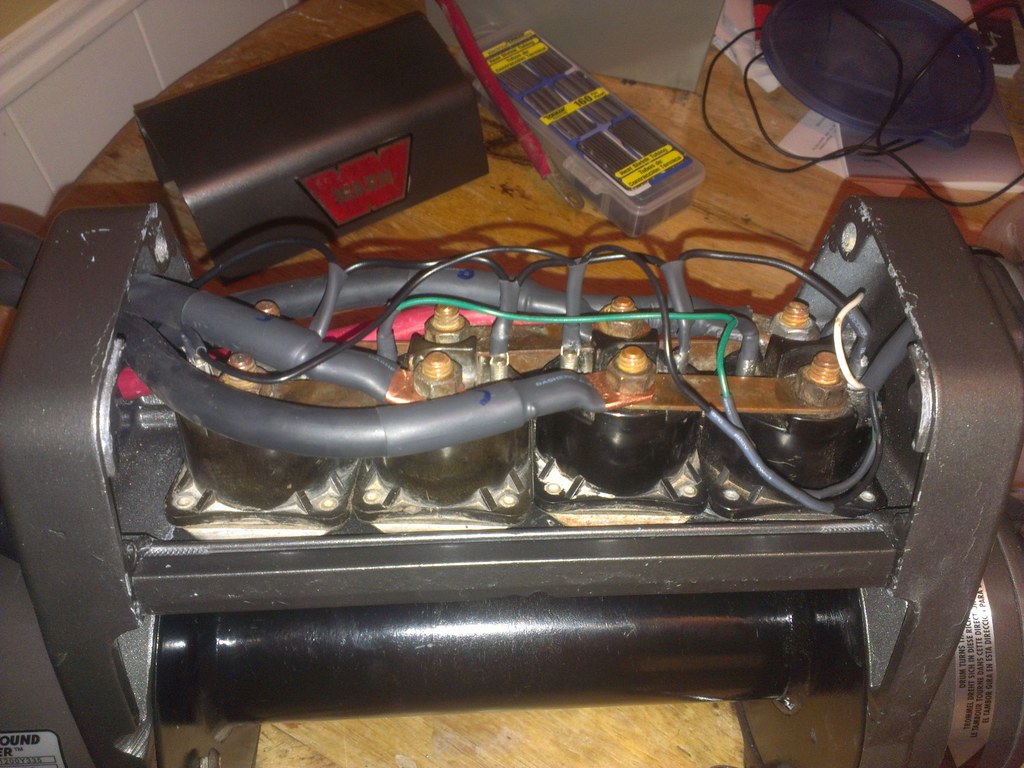
Warn XD9000i, Serial #359923. This thing has seen some better days. There is a lot of chipped paint on it. If you look on the left side of the picture, you'll see that at some point, the wire ripped through the body and cut a chunk off. I also noticed that one of the screw holes in the gear housing is cracked. Overall, it was in pretty crappy condition. Let's take it apart and see what we find.

First, we'll take the gears out.
Image

Ok, not the worst. The teeth are in good shape. Not too much rust here (note that this was after I wiped it down a little bit). Let's look at the gears themselves.

Image

Yup. This should be interesting. Let's remove the outer gear.

Image

Image

Mother of god. Let's take more apart.

Image

Image


So the good news is that all the teeth seem to be in good shape. At some point, some water must've sat in here and the PO probably didn't bother to get it out. I dont think this winch has ever been opened really.

So I spent several hours cleaning this gearbox. Here are the results:
Image

Image

Image


Continued...
 
#2 ·
Part 1b, Initial Major Cleaning 11/18/12

Much better. I won't be turning this guy on for a while, so I didn't grease it up yet. There's a special kind that Warn recommends that I will order next week. So now that the gears are done, let's look at the motor on the other side.
Image

Image

Image

I'll be honest here and say that I'm not sure if it's good or bad. It looks like the inside of a motor. Nothing looks burned I guess. I will say that I'm pretty sure the PO wasn't entirely honest with me. He told me that this thing ran fine, but the wires that connected it were torn in half and connected with painters tape.

Image

There's no way this thing has ran lately. So let's open up the solenoids and look at them.

Image

I immediately regret this decision. At this point, I decide that there's no way in hell I trust any of this wiring. Most everything was extremely corroded and there were wires just hanging there not connected to anything. I mapped out all the connections for reference and pulled all the wires out. I also decided to take the entire body apart to inspect it.

Image

The roller wasn't really bad at all. Some grime and lots of dirt, but no issues that I could see. The 2 edge pieces were totally fine. Same dirt as everything else.

After I got them cleaned up, I started to put it all back together.
Image

Image

Image


.. and here is how she sits now:
Image


Can't really tell anything different on the outside, but the inside is a hell of a lot cleaner.

So really to rebuild, here's what I'm pretty sure I have to order:
- all new wiring. (done)
- remote. (done)
- new motor. (done)
- clutch lever. (done)
- bolts for the gear box. It only has 3 bolts when there should be 12 or so. (done)
- long bolts to keep the top cover attached. I have none when there should be 2. (done)
- 2 bolts to attach the center solenoid holder to the body. There should be 4 but I have 2. (done)
- center hex rod. (done)
- 2 nuts for the bottom legs to attach them to the winch mount. There should be 4 but I have 2. (done)
- all new gaskets. (done)
- winch mount. (ordered)
- cable. (ordered)
- fairlead. (ordered)

It looks like a lot, but I'm pretty sure most of it is going to be cheap (with the exception of the mount, fairlead and cable). I also think that I'm going to end up repainting this thing. The paint is chipped in a lot of spots and I don't want it rusting. I'm really, really, really happy with how the gears look. I didn't notice a single chipped tooth. The center rod seemed to be worn a little bit, so I'm considering replacing that. I'm still not sure if the motor even works, but we'll find out when I get it hooked up.

So that was my evening project. I used a lot of Simple Green and an entire pack of microfiber towels. Well worth it though. I really like how these things are built. They seem extremely solid and I can definitely see why they last a long time. I'm also researching what type of cable I want. I really like the synthetic rope option, but that is a hell of a lot more expensive than the normal steel line. I'm hoping I can get this all together and on the jeeper before I drive it up to Pennsylvania at the end of December. Fortunately I got a little award at work that came with some money, so I can have a little extra fun with the jeep than I had initially planned.
 
#3 ·
Part 2, Primer 11/27/12
Part 2 of the winch rebuild. While waiting for my parts to arrive, I took apart the end housing, ring gear, solenoid holder and drum assembly. I sanded them all down to get rid of any rust that's on there and threw a coat of primer.

My makeshift paint booth:
Image

Image

You'll have to excuse the mess. I had to move a bunch of projects out of the way to put this there.

Here's the solenoid cover all done with the original badge that I salvaged.
Image


Here are the 3 pieces all primered and ready for paint.
Image


I didn't want to cover up the serial number, so I put tape over that area. The sticker will cover the different looking paint once it's on. I also taped everything up so none of the gears get paint on them.
Image


This next one came out crappy and out of focus, but it's the main drum. I sanded all the rust off and painted it using engine paint.
Image


Overall, everything is looking goooooood. Next on the list are the two drum supports:
Image


They have already been sanded and taped up, but I noticed some dirt on the insides so I'm going to reclean them. They are the last of the pieces that need to be painted. After I'm done painting, I'm going to wire everything back together in anticipation of receiving my motor sometime this week hopefully. The rest of my spare parts are due to arrive on Friday. My clutch handle arrives on Thursday. The guy I was going to purchase my winch mount from bailed on me, so I need to find another one of those. He was going to give me a Warn mount for $90. Seemed like a good deal.

So all that's really left to get is the rope, fairlead and winch mount. I'll probably go with Amsteel Blue unless someone can convince me that the Warn rope is better. I've also decided to just wire up in-cabin controls for the winch. It's a lot cheaper and the electronics look really simple. I might just make my own remote at some point instead of paying a ridiculous $70 for what amounts to 2 switches and a long wire.
 
#4 ·
Part 2a, Paint Done 11/30/12
Got a whole bunch of tiny little winch parts today. Also got the decals from Warn. The decals didn't quite match up, so I'll have to trim them. I also finished painting everything today.
Before
Image


After (90% of the way there)
Image


New motor and clutch handle should come on Monday. The cost for new wires is going to be ~$20. The switch will run probably another 10-15 (I'm going to run it into the cabin). As long as the solenoids are good (I'll test 'em once I get it all wired up), I just need to get the thing mounted and add some rope. Really happy with how it came out.
 
#5 · (Edited)
Part 2b, In-Cab Control Parts 12/4/12
Winch motor came in yesterday. In true Roy form, once I got it unpacked, I was looking inside and the internal part of the motor fell out. So I got to take it all apart and put it back together. Hopefully it still works.

Clutch lever also came in.

I also ordered some parts for the in cab winch control. If all goes well and it's as easy as I thought, I think I'm going to fabricate an actual controller up too and have it 3d printed. Here are my incab parts:

Image


The toggle switch will be for the winch on/off. It has a built in LED to show that it's on, but I'll probably wire another LED somewhere obvious in the dash. The 2 black push buttons will be for the out/in buttons. Whenever I order stuff, I tend to get distracted and get some little things I might not need. In this case, it was in the form of a 12v blower and metal knobs. I'll find a use for them on some project.

Image

Made all new wires for the motor/solenoids. Couldn't find anything pre-made, so I purchased the 2 gauge wire from Lowes and the ends from O'Reillys. I thought this would work. Unfortunately when I went to attach everything, I found that the Lowes wires were way too stiff. I couldn't get them to bend enough to make them work. I think I might try heating them up and just flexing them to see if that'd work. If not, I'll try and source a set of wires from somewhere else.

Hopefully the gear grease comes in today. I ordered Aeroshell 33SM. It's a replacement for Aeroshell 17 or whatever it is that Warn recommends. Still need to get a winch mount, fairlead and rope though.

12/6/12
I called NAPA today and it turns out they have 2 gauge wires that are relatively flexible. They'll also mount the eyelets on the ends for me so all I have to do is add the heat shrink tubing. I'll stop by there after work and just grab their stuff. It goes over my wire budget, but it'll only be an additional $10 or so.
 
#6 ·
Part 3, Before/After 12/9/12
Before:
Image

After:
Image

Aeroshell 33SM grease came in on Saturday, so I got that in the gear box. I replaced all the gaskets as well. All the bolts have been replaced and I got all new nuts for the feet.

The NAPA wires ended up being very flexible. I just need to get those hooked up, order the rope I want, order the mount/fairlead and wire the in-cab controller and I'll be good to go. Speaking of in-cab controller, here's the power switch mounted up:
Image


Nice and out of the way. I ordered the wrong in/out buttons. I thought they'd be small, but it turns out I ordered the same type of buttons that you see on arcade consoles. On the one hand, they have a really awesome clicky feel to them. On the other hand, they're pretty f'n big. I'm going to just pick up a toggle switch from radio shack and use that instead. I'll probably mount it right next to the on/off. I have all the wiring for those switches already, so that should be a quick job.

edit: Ok, I just bit the bullet and ordered 3/8 x 85' of Amsteel Blue synthetic line, a winch mounting plate and an aluminum hawse fairlead. I now have everything I need to finish up my winch setup.

I broke down how much I spent on everything. Original price of the winch was $125. It cost me $300 for all the replacement parts and the grease. That brings the winch + parts total to $425. The synthetic rope was another $240. That brings the total winch + rope cost to $665 which is about half the cost of a new one. Used ones were going for $550-650 and that was with steel line, so I'm happy with this rebuild. The only thing that could screw my costs up is if the solenoids are shot. I'll find that out once I get this thing mounted and wired up. I believe the solenoids are $25 a piece, so tack on another $100 if that's the case. Either way, still much cheaper than a new one and I had the fun of rebuilding it all.
 
#7 ·
Part 4, Solenoid Wiring 12/11/12
I got the wiring all done tonight. This is the abomination that I found when I first opened it up.
Image

Image


And here she is now:
Image

Image


The wires were fun to make. I had no idea where I could find the terminal ends for the solenoids. I was going to run to NAPA when I realized I could just take the female ends of bullet terminals and widen them. Here's a before and after:
Image


Once I had that, it was just a matter of cutting the wires to fit and soldering them all together. The only issue I'm having is that there's a little rubber grommet that fits into the hole where the solenoid and battery cables go into the solenoid pack and it does not fit. The cables I have on there now are much, much thicker than the old ones and they practically fill the hole 100%. I might just run some RTV through it and call it a day.
 
#8 ·
Part 5, In-Cab Control Install 12/12/12
I got the controller wired up tonight. I did it a little differently than you see in the other setups. In the other setups, people ran the power, line out wire and line in wire directly from the winch to the switches. I felt that this was a bit overkill. Solenoids are like relays in the sense that they don't care where the trigger power comes from. Trigger gets power, solenoid engages. Trigger loses power, solenoid disengages (assuming there's a spring). Instead of tapping into the winch power and running a third wire back, I tapped into the cigarette lighter. Nice thing about this is the winch can't be accidentally left on while the jeep is off. If the keys are out, the winch is off. Other nice thing is that it's right there inside the jeep already, so I don't have to run a super long wire. I'll show pictures in a minute.

The other thing I did was put a quick disconnect. I read this idea on another forum and I really liked it. I ended up using trailer wire. Anyway, onto the pictures.

First thing we need to do is set up the wires inside the winch solenoid pack itself. This is pretty straight forward. 2 solenoids control the line out and 2 solenoids control the line in. If you remember from our previous solenoid wiring experience, the controller plug has 3 lines: white to battery +, black to solenoids [1,3] and green to solenoids [2,4]. When you press "out" on the controller, the switch just routes power to the black wire which engages solenoids [1,3]. "In" sends power to the green wire engaging solenoids [2,4].

Disclaimer: I might have my out/in solenoid sets confused and the "Out" might be [2,4]. Fortunately, all you have to do is switch which button the wire plugs into and everything is fixed. I'll touch more on that later.

So for our in-cabin controller, all we really need to do is send power to the green or black wire. Let's create a diagram.
Image


And here's how mine looks:
Image


Now I messed up in that I should've used the black/green wires for the trailer plug to be consistent, but I was talking to my wife while I was doing the cutting and ended up clipping the wrong wires. So for my setup, I went with white->green and black->black. Very important to also note that we are not connecting to the black ground wires. Can't emphasize that enough. The ground wire connects to the motor ground and the - terminal of solenoids [1,2,3,4]. We are not connecting to that. I just want to make that clear in case someone is reading this because they want the same setup.

Ok, so now we have a wire attached to the winch black control wire and another attached to the green wire. All we have to do is run it to the trailer plug and close things back up.
Image


We now have a quick disconnect in case we need to take the winch off for anything. Also notice my new stickers on the gear housing :]

Wiring up the jeep is a piece of cake now. First thing we do is run the wire all the way from the passenger headlight area to the interior of the cabin. I don't have a picture of that whole setup, but here's a picture of me holding the trailer plug.

Image


I don't know why I took that picture. Also please forgive me for the K&N air filter. It was on there when I purchased the jeep and I haven't found anyone selling a stock setup yet.

Next thing we have to do is mount our controls. I chose to mount mine right next to the ignition. I did this because I like to ride with the doors off a lot. Next to the ignition, the controls are out of the way and not as obvious. Also if it's dirty/wet/muddy/whatever out, the controls are less likely to get dirty there.

Image


If you're going to mount them there, be careful you don't cut the support bracket right behind the top button.

Next thing we need to do is wire up the buttons. Since we are taking power from the cigarette lighter, you'll need to take your dash apart to tap into that wire. This switch also has an LED on the top of it, so you'll need to find a ground if yours does too (I used the ground next to the drivers side speaker). Once you have those wires set up, it's time to attach our switch to our buttons.

So the concept here is this. Key turns the jeep on and jeep sends power to the cigarette lighter, which in turn sends power to our switch. When the switch is off, no power is being sent to the buttons. When the switch is on, we need to send power to both buttons. This is as simple as connecting the "out" terminal on the switch to a terminal on each button (it doesn't matter which terminal you plug into on the button). Here's a picture of the "splitter" wire that I made for my switch.

Image

Your switch should have labels on it. The top most terminal on my switch is labelled "out", so I just take two wires from that and route it to my buttons. Directly below that terminal is the "in" terminal. That's where I plug my cigarette lighter adapter into. Lastly, there's a ground on the bottom.

So now we have 2 terminals left, 1 on each button. All that's left to do is attach the wires that we previously ran into the cabin to those buttons. I have my red button wired for "out" and my black one for "in". If you get them mixed up, all you have to do is switch which wire plugs into which button. Easy enough.

Now you test everything with a multimeter just to make sure and if all works out, you put everything back together.

Off
Image


On
Image


I'll be labeling my buttons at some point.

So there's my in-cabin controls for the winch. I'm also hoping to pick up an actual controller in the future. The nice thing is this setup doesn't interfere with the normal controller at all. You could even technically use both setups at the same time, as long as you're not pressing the opposite buttons at once. That would more than likely cause a fire/blow your motor.

So that's my in-cabin controls setup write-up. Winch mount is supposed to come in tomorrow. I'll finally get the thing mounted up. Rope and Fairlead come in next Tuesday which is just in time for my roadtrip. I look forward to getting stuck and using this :D

Oh and one more thing to note. You could, if you wanted to, put an inline fuse between your switch and the cigarette lighter adapter. I chose not to simply because I'm fairly certain the cigarette lighter adapter is on a fuse of its own. I might change my mind later in the future, but for now I'm ok with how it is. When the solenoids draw power, they are not drawing it from your trigger wires. They're drawing it from those 2 gauge wires that are attached to them. Your switch wires are simply telling them "hey, wake up, do your job you lazy communists." I used 14-16 gauge wire for all my switches and buttons. The original wires were 16 gauge.
 
#16 · (Edited)
I actually ended up ordering this: WINCH QUICK CONNECTOR : Amazon.com : Automotive

Should arrive on Monday. Also found out today that all 4 solenoids are shot >:[ New ones will arrive on Monday as well.

Yeah, I ended up using #2 cables from NAPA as well. They were just flexible enough to let me maneuver them around the solenoid pack. Fortunately all my bolts came out fine, but I ended up replacing every single one due to rust. They were cheap enough.
 
#17 ·
With so much done to it, I have to ask how much you have in parts for this? Also, on your in cab switch, how did you determine where to put it? Seems like anywhere on the dash might be difficult to reach when in a position where the rig is nose up and/or your seatbelt is locked. I been needing to do an in cab for a while, but placement has been my biggest hold up. Sorry for the sidetrack.
 
#18 · (Edited)
Well, it turns out 2 out of the 4 solenoids are bad so I just ordered 4 new ones. Taking those into consideration, I'm at ~$700 total and that includes the synthetic rope.

I ended up putting it right next to the ignition. That lets me keep my left hand on the wheel and winch myself forward if needed. If I want to be outside the Jeep, I can reach the switches no problem. Lastly if I really want to use a controller, the in-cabin setup does not interfere.

I wanted to stay towards the inside of the jeep for the controls because I like to keep my doors off as much as I can. I wanted the controls in a spot that's not as obvious for passer-by's.
 
#19 ·
I just went through my XD 9000 (not a 9000i). Looks to be a similar vintage though. What did you do with the brake, I don't see any mention of it. I had to replace mine. They have updated the brake to a new style that is totally different than what I had.

Good write up!
 

Attachments

#20 ·
I honestly didn't touch my brake. I'm tempted to open it all back up and check it out. I need to figure out how that thing even comes out. I'll probably do that tomorrow. It's such a pain taking the thing on and off the Jeep that I don't want to touch it anymore, heh.

Does the new version work with the older models?
 
#21 ·
Did your brake look like the one in the picture? Mine was very simple, it only had a spring on the inside. The new one has brake pads that rub on the inside of the winch drum.
 
#22 · (Edited)
Mine looked different. Pretty much the same exact thing that's posted here: Warn xd9000i Winch Rebuild

So one thing that concerns me is that someone talked about it unwinding? I found that on another forum. There's no mention of that issue on the rebuild I posted or any other rebuild though. The only thing people ever say is "don't drop it because it can easily break and it's expensive to replace." My brake pads looked pretty freakin clean, so I didn't bother with them. I just cleaned it up and put it back in.
 
#23 ·
So, some pretty crappy news to report. The rope and new solenoids came in yesterday. Got it all hooked up and when I pressed the line-in button, the winch didn't do anything. Same for line-out. At this point, I had checked everything I could and the only piece I've never really looked at is the motor itself.

I took it off the winch to find this:

Image

Image


I have no idea how this could've happened. Maybe the solenoids threw too much power? I don't know. I'm hoping it's still under warranty as I haven't even had it for a month and it has 0 pulls on it. I sent Warn an email last night to see what they'll say.