Pirate 4x4 banner

Lwb Samurai build round 3

258K views 441 replies 108 participants last post by  BCzuk  
#1 ·
So I have been saving up $$$ and trying to find good deals on parts for the last year. A couple months ago I had gathered enough stuff to get going so I started 3rd round of changes on my Samurai. The truck was wheeling great but I wanted it to be a bit lower and gain some wheelbase.

A short recap:

Round 1 was toys, yjs, 16 valve and some 6.5s

pirate4x4.com/forum/showthread.php?t=685136&highlight=lwb+samurai


Round 2 was a 22re, toy 5 speed and toy duals with some armour

pirate4x4.com/forum/showthread.php?t=801699

Round 3 the zuk is getting linked with coilovers front and rear. It started off with the project going to be some what simple but some changes a long the way turned into being a bit more time consuming :D
 
#3 · (Edited)
I am doing the build at my work so I need to keep the truck able to move in and out so I started with tackling the back first. Once the back is ready to go I will start the front

I had to make room for the rear coilovers so I decided it would be easier to start with a fresh rear frame. I used some 2x4x1/8 wall for the new frame rails. I also used 1/8 plate for the reinforcing

Cut and angled the new pieces to match the curve of the stock frame

Image


I added some DOM sleeves for the bumper

Image


Welded on

Image


Top and bottom plates

Image


Also plated the outside and inside. I dont think it will ever break apart :D

Image
 
#6 ·
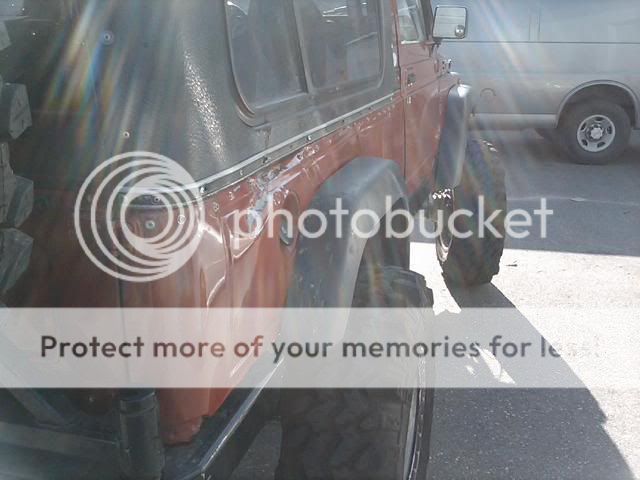
So last year we went down the Hammers and the body took a bit of a beating especially the passenger quarter panel

Image


Image


Image


Image


So after much debate about how we were going to do the rear wheels we decided to start fresh....

Bye bye lwb body lol

Image
 
#12 ·
Took the opportunity to build the new exhaust while I had lots easy access. Im going to try a smaller stockish muffler due to packaging and trying to keep the sound low http://www.summitracing.com/parts/WLK-17702/ I also bought some universal U bends, a universal flex pipe and stainless exhaust clamps. $160 and a couple hours and i had some new custom exhaust

Image


Image


Image
 
#13 ·
BigCountyCustoms hooked me up with a great deal on some 37" Procomp stickies

Image


and UGET IT from Method Motorsports (P4x4 vendor) was the hookup for some new PRP seats. I was extremely happy with my dealings with both companies :beer: Since I am changing the rear wheel wells I was able to order a 40" wide rear bench. PRP also made a rear booster cushion for my 4 year old which the harness loops through

Image
 
#14 · (Edited)
I used some 10 gauge satin-coated steel to start on the new body panels. I welded the new panels to the 3/16 that was already there for the rockers to start joining it all together.

Image


Starting cutting the wheel wells and rolled some material for the corners
Image


and once they were set I added some 3/8s solid to the wheel well edge to smooth it out

Image


Getting there

Image


Image


Image
 
#19 ·
Thanks

you lost the mini truck tail gate! LOL
Pics went back in time :laughing:

I have been uploading pics from my iphone from the last couple months so some of the timeline is a little off. That also explains the great quality of the pics :flipoff2:


My old super gas tank wasnt going to fit any more so I bent up some 1/8 aluminum and my friend was nice enough to tig it for me. The tank is 24"x18"x6" high which gets me just over 11 gallons. I had to crop off one corner to clear the exhaust

Image


move the Walbros and other guts from the old tank

Image


Took advantage of the powdercoating at work

Image


Here is the gas tank skid plate which is also 1/8 aluminum

Image
 
#20 · (Edited)
I wanted the zuk to be somewhat weather proof so Cody and I started planning out the rear sheet metal a few weeks ago. Most of the stuff in this build was cut with a 4.5" angle grinder and cutting discs :D

Making templates
Image


I used 14 gauge satin coat for all these pieces
Image


I didnt take any pics but I used some 1'x1" thin wall square tube for a frame under the floor and some heavier 1"x1" for the rear seat frame

Image


Welded up and ground smooth

Image


Image


In this pic you can see the latches we used to close the tailgate. Just some simple stainless steel spring loaded pins that I modded to get the handles outside of the aluminum skin.
http://www.amazon.com/gp/product/B002SLFZWC

Image
 
#22 · (Edited)
Last weekend I was able to finish up the sheet metal and get it all in primer. I also spent a couple hours underneath with a tube of seam sealer so hopefully I wont have any rust for a while.

You can see the added bar to the shock tower for the rear harnesses

Image


Cody spent a couple hours smoothing out some of the weld seams

Image


Then the other day I gator guarded the interior and wheel wells

Image


Powdercoated the rear diff and tailgate

Image


Image
 
#23 ·
Since my gas tank is stuffed right under the floor it was going to be a pain to have a fuel door on the body without losing space in the rear cargo area. I found this cool gas fill from a boat place online which looked like it would work.

It connects right into the top of the gas tank with a short 2" hose.

Image


Image
 
#25 ·
I know I know but it was just too smashed up to really fix it right. Plus the drivers side had alot of mud in it from its previous life. If I could afford to have 2 I would of started over with a swb but you have work with what you have.

As it sits now I am at 104" wb and after the front is done it should be about 107" so its now a longer lwb Samurai :D
 
#27 · (Edited)
I added a couple inches to the overall body length so no more hard top but someone local is going to be building me a sweet safari style soft top in the next month or so.

The hardtops are fairly rare so I will hopefully find another lwb owner that can use it since its in pretty decent shape