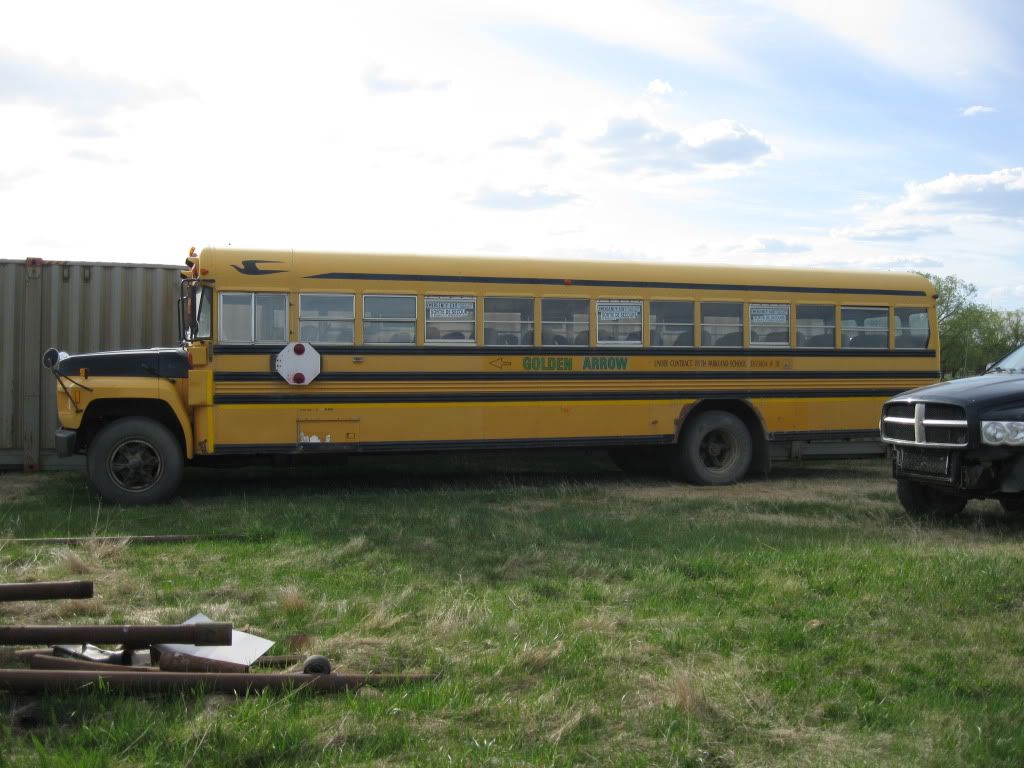
Pirate 4x4 banner
61 - 80 of 230 Posts
Discussion starter · #63 ·
Progress has slowed a bit due to me having kidney stones. They can hit at any time, and hurt so bad that I become completely helpless and almost unable to move.

Drilling the rivet holes in the aluminum trim. I set up a jig on my drill press with some angle iron so the holes are all consistent.

Image

Image

Image

Image

Image


I made sure to use seam sealer behind all aluminum to avoid contact with the steel. Thick paint, and seam sealer should slow down the dissimilar metal corrosion.

Image

Image


I also used seam sealer around, and under every rivet that enters the cab.

Image


Behind where the turn signal lights used to be on the back. Seam sealed water tight.

Image

Image


Nat
 
Discussion starter · #65 ·
I finished cutting out the rest of the firewall that was in the way of my double stack heater core placement. This will all be rebuilt with 14 ga.

Image

Image

Image

Image

Image

Image


Then I cut the inside corners out. There was more old seam sealer hiding more rust. This will prevent my rear cab corners from rusting out from the inside.

Image

Image


Originally the bottom inside panel on the bus where the seat mounts were welded to the floor. To remove all the rust, I cut them all loose. Doing so removes the connection between the floor and the wall posts, leaving the upper cab floating. I previously bent up some 3/16 stainless steel pieces to rivet to the wall posts, inner skin, and bolt to the floor on every floor support. Floor support cross members are every 12”.

Passenger side.
Image

Drivers side.
Image


Nat
 
Discussion starter · #67 ·
Painting the last fender.

Image


Image


The other piece of the fender. The rust was bubbling where the two fender pieces contacted. So I pulled it, cleaned it with a wire wheel, degreased, primed, coated with Por 15, and top coated with Rustoleum. The only rust damage is not visible once the fender is reassembled.

The steel part.
Image


The fiberglass part of the fender where the steel one contacts. I sanded all the rust off the fiberglass.

Image


Some black Por 15 for the spot where the rocks chipped all the paint off, and started to rust.

Image


I removed the fender mount that had rust behind it, gave it a coat of Por 15, then riveted it back on.

Image


Fender back on.

Image

Image


Nat
 
Discussion starter · #68 · (Edited)
I sanded, primed, and painted the mirror mounts.

Image


Image


Installed, waiting on the new heated west coast mirrors. The old mirrors were so rusty, one fell off on the way home.

Image


Here is the other.

Image


Nothing much to see here, just a chemical reaction taking place, converting the rust back to steel. The product being used.

Image


Image


Image


I finally got the hood set back on. Until I rebuild the hood pivot, it won’t close properly.

New bushing is a piece of ½” pex water line inside a ¾” piece, pressed into the hood hinge. The ½” hood bolt fits perfectly inside the ½” pex.

Image


Image


Nat
 
Discussion starter · #70 ·
Current back view.

Image


Image


Image


Image


Image


A 5 x 9 sheet of 3/16” Aluminum that weighs 110 pounds. This and a few others will be used as floor underlay where most would use plywood. The aluminum will distribute the heat from the in floor heating, and will not rot like wood.

Right not it’s keeping the wind out of the bus body I removed.

Image


Minor scratches on the serface of the Aluminum. This will not matter, as the final flooring will be a sheet of 3/16” diamond tread rubber.

Image


Image


Nat
 
Discussion starter · #71 ·
I have to go build a garage that will take me a week, and the weather is calling for rain. Weather was not warm enough to paint the floor with Por 15. I got the Metal Ready on so I can’t have the floor contaminated by rain. I installed all the windows, and begun reworking the back door, making it lighter, and removing the lower window. Its no longer a door, the only time it will be removed will be when the Camper is on deck.

Starting to remove the lettering on the rear door.
Image


No pics of the work due to no time.

The way she will sit for the next week.

Image


Nat
 
really like where you are going with this, most of the time a school bus project especially one done outside you would imagine to turn out hack but you are definitley doing a good job in a minimal area with minimal tools.
 
Discussion starter · #76 · (Edited)
Thanks for all the comments guys.

All my build threads will be on hold for a few months due to a immanent Divorce that had been coming for some time. All units and tools will be moving to a new location, as she will be keeping the house.

Thanks again for all your interest.

Nat
 
61 - 80 of 230 Posts