Pirate 4x4 banner

91 K5 Crawler Build

14K views 76 replies 17 participants last post by  Kay86K5  
#1 · (Edited)
Going to copy and paste alot of this from another site to get this thread up to date. Nothing really special, its pretty much your run of the mill Chevy build... 52s/63s, doubler, tons, etc

Picked up a 91 K5 last weekend as a new wheeler. Truck is bone stock, 350TBI/4L60/NP241/10B/Rape Red Interior/Random Dent Mods.

Couple of pics

Coming home.
Image


Poser Flex Shot:
Image


Plans are at this point:
Axles:
D60/14BFF
5.13s
Welded Rear, Lockright for now
35 spline shafts/drive flanges in the front
Disk brakes/Pinion Guard on the 14ff

Drivetrain:
TBI 350
Currently a 4L60, thinking of going to a th400. went with TH400
Doubler (either 241/205, or 203/205). Planning on a all 32spline 205, twin sticked for front digs. went with all 32spline 203/205
All 1410 Ujoints

Suspension:
52s up front, axle moved forward 2-3". diy4x B52 kit
63s in the rear, shackle flip, moved back 2" probably ORD shackle flip an custom mounts for 63s
Poly Performance BBCS or any decent priced 14" travel shock I come across 12" and 14" Bilsteins

Tires:
40-41" range Tires, brand undecided. In order of preference: Krawler, PBR,Old Style MTR, Irok, or TSL 39" Iroks until I find something bigger

Other:
Hydro assist, possibly full hydro if I run across the parts cheap enough hydro assist. Ported box, reservoir, cooler and a PSR ram
Full cage, no exo though. nothing yet
Harnesses nothing yet
Seats (to replace the rape red lazy boy seats in it currently) Corbeaus
And other stuff I need as I wheel it.

Starting on it this weekend. Plan is to try and blow up the 10 bolts this weekend, the strip out the inside, axles, and suspension and prep it for the new suspension and axles.
 
#4 · (Edited)
One of the help for the weekend, obviously doesn't share my feelings towards Bud Light Lime:
Image


Testing the new color. Allis Chalmers Orange with some flat black thrown in to break it up. (ignore the ghost dick)
Image


I know the whole "why paint it, its a wheeling rig" but its ugly right now and I'm going to need to paint it after cutting up the body. The paint can be bought for about $25 a gallon, which will get it done. I can also get it in a spray can for easy touch ups where I get gouges into the metal. All said and done I should be able to paint it for less than $50.

Brackets all burned off:
Image


Clearance for the flipped 203 made:
Image


I originally was going to cut the whole tunnel, but due to the difficulty of cutting it out and fabbing one up that would look right, I chose to cut it like I did, and just build a slightly raised section to clear the tcase. I changed my mind and ended up building a center console for it

My ******* parts washer:
Image


Some pics of the drivetrain after powerwashing. I will be cleaning these up a bit more and painting them just so it doesn't look like a bunch of junkyard parts under it:
Image

Image

Image


Work area is filling up... need to make a couple of runs to the junkyard:
Image


Finally, hovercraft mod:
Image
 
#5 · (Edited)
Got to thrash on it this weekend with several people. Was a blast as it always with when you are wrenching with buddies, drinking beer, shooting guns, etc

Cutting/grinding/shit:
Image


And some of this after several beers:
Image


Great friends of mine figured the roof would look better with decorations...
Image


We actually got alot done. Cleaned up and painted alot of parts, twin sticked the np205, welded up the spiders in the 14bff, cleaned/checked/painted the D60, got the new hydro assist box in, etc. Next time I should be able to get the D60 in, the 52" springs, and the steering in. Still need to figure out how to get the trans and tcases on to the motor... I know its going to be a complete bitch and am not looking forward to it at all. Anyways...
 
#6 ·
Nothing too exciting this weekend. Just me working on it by myself, so going was slow. Projects for this weekend were to finish getting the hydro assist box mounted and plumbed back up (done), set up the 14bff after welding the spider gears (done, ended up at .009 backlash... good enough for a trail rig), and start boxing in the frame to avoid it cracking and tearing over time. I'm using 1/8" plate to box in the frame, and some scrap 2x4 3/6" tubing to make tie-ins between the frame and the plate I'm adding in certain locations (where sliders will mount and where cage will mount). GM in all their wisdom ran the wiring for the tail lights down one side of the frame, partially on top, partial inside. This was a pain as I had to remove all the wiring from the channel before boxing. Where it was mounted inside was no problem, but several of the places where it was mounted on top... well... it had been done before the body was put on. So out came the cut off wheel and some patience. I basically cut as much off of the bolts as I could then backed them out... long story short, wiring was removed, but was a huge pain in the ass. On the passenger side channel, all the brake lines and fuel lines are bolted to the frame. About 15 minutes and all of that was taken loose. No pics of all the disassembly, but pretty boring stuff anyways.

On to the pics:

Partially done. There are tie ins on either side of the rear body mount, and one up towards the front behind the front cab mount. These just make the mounting points for sliders more rigid:
Image


Couple of plates cut to fit. I was working on making tie-ins for the future hoop that will run behind the passenger seat. Was a huge pain in the ass and thats why none of it is tacked in at this point. Also, the picture makes the gaps look bigger than they were... biggest gap was about 1/16":
Image


Frame tie in on the last plate in line in the above picture. Probably overkill but I had plenty of scrap 2x3 tubing to use. I welded the box tubing between the inside plate (used to box frame) and another piece of 1/8" that was rosette welded to the frame and welded everywhere inside that I could get a welder to. This makes the area the hoop will attach to 1/4" thick, as well as ties it in to the boxed part of the frame. Future plans also include tying the frame rails together at this point, which will also provide a point for to mount a vertical bar in the middle of the hoop, going down into the bar tying the rails together. Probably hard to picture what I'm describing... sorry:
Image


Holes I cut for rosette welds (okay, I'm not that good with a torch... cleaned up with a small rotary bur tool in an air grinder):
Image


Anywho... hopefully another weekend and I can finish the passenger side. I'm only boxing back to where the tank mounts right now. I just don't want to cause any issues with getting the tank back in. I also want to box all the way to the front, but that will have to wait until the day I blow up the 350 and have to pull it out... which may be my first trip out, or it may never happen. After next weekend, not much will be happening as I am possibly changing jobs and moving to Houston. That will eat up alot of my time as well as going skiing the last week and a half of December. Hopefully after the first of the year, I'll have a big chunk of cash to spend on some pretty parts (shifters, seats, shocks, tires) and can get a work party together again to thrash and get all the springs in and axles in and have it rolling.
 
#7 ·
Not a whole lot of pictures, but here's an update. Only me and a buddy working on it this weekend, but still made pretty good progress. Started out Friday painting all the pieces left so they could dry overnight. We then hung the front 52" springs. Had to do some minor cleaning up of ubolts and spring plates as well so that ended up eating up Friday. Saturday, I spend a large part of the day boxing the passenger side frame in, while my buddy Evin assembled the hubs/brakes on the axle. We drug the axle under and got it bolted in and got all the steering hooked up. I lucked out in that my front brake lines (were on the axle when I bought it) are long enough for the springs at full droop so I don't have to buy custom lines. My hydro ram hasn't come in yet, so thats all thats lacking to button up the front. When it gets here, I'll plumb the cooler and put the hydro ram on. The springs are hung in the 2nd hole from the front, which should put it at about 1-1.5" forward.

Pic:
Image


Front 60 consists of GLO cover, Rockstomper crossover steering, 35spline throughout, drive flanges, and a lockrite. Currently 4.10s . Going to run 4.10s till tax season next year and then I'll do cryo'd D70 5.13s with an ARB.


Sunday, we worked on setting up the rear. We had to knock off kind of early, so that combined with a parts run didn't leave a whole lot of time, but I was able to get my front hanger for the 64" springs tacked together and tacked to the frame. I'm using an ORD shackle flip with a 6" shackle in the rear, and had that tacked on. My initial math was a bit off as my shackle angle with no weight on the springs is at 30 degrees from vertical. Compressing the spring pushes the angle to 53 degrees from vertical. I'll have to move the spring hanger back 2.5" more, which should give me about 5 degrees from vertical with no weight on the spring, and almost 30 degrees with weight on the spring. I have my front mount pushed as far foward as I could go without cutting up the body mount. This will/should push my rear axle about 1.25" back (so over all I'll gain about 3" of wheelbase... not a lot, but everybit helps). I may end up having to use a zero rate to level out the blazer... if so I'll move the axle back more. I'm also going to leave the overload springs in for now. They don't seem to hamper flex at all, and it may help keep axlewrap from being a huge issue.

Only pic I have:

Image


Ignore the body, friend of mine got after with a flap wheel after a few too many beers. So he'll also learn how much fun it is to sand all that down so its somewhat smooth before we paint it.

Next time I work on it, I'll grab more pictures, but we were too busy working to really grab pictures.


On a side note, I finally picked up a auto-darkening helmet and that thing is the bomb dot com. I can't believe I have gone so long without using one. Made fabbing stuff up so much quicker and easier.
 
#8 · (Edited)
Beef brackets for 64" springs done and installed. Pic makes the welding look meh, but its on there. One of these days i'll be blessed to weld to clean, virgin metal, not something that is 22years old and spent half its life covered in paint, oil, and grease.
Image

Image


PSC Ram mounted up. Yes I know the tie rod is bent, but it looks worse in the picture than it actually is. Its plenty of beef and if it ever tacos, I'll replace it. Until then, I'm just going to run it. Unfortunately, I am missing fittings to finish plumbing the ram. Should have it done whenever the fittings come in.
Image


Rear axle in. 14bff, disk brakes, GLO cover, welded, slight shave. Nothing out of the norm here.
Image


Some bling bling. Northwest Fab triple cable shifters for my doubler, and Art Carr shifter with Rockgate pattern (no gate between 3rd, N, R). Shifter has the reverse and park/neutral safety switches as well (not halfassing this stuff). Trans and tcases are ready to go in now. Just have to find time.
Image


How it sat after Saturday night:
Image


How it sat after the entire weekend. Don't laugh, its just a set of roller tires/wheels I picked up for $25. I'll need them to fit this thing on a trailer since it'll be too wide (using my dad's car hauler for now, no removeable fenders). I'll get rid of them once I buy a trailer and make removeable fenders.
Image
 
#9 ·
Not a huge amount of process this weekend as we worked on a million things.

Things from the weekend:

Built a firewood rack for a friend that has been helping with all this crap.

Built a rack to get all my steel off the ground and out of the way

Oh, and put the trans/tcases in the K5 :pepper: Pics below:

Tinkering with different weld patterns on the firewood rack since they aren't super critical. Aesethically pleasing weld.
Image


Tube rack. Nice to have all of this consolidated instead of all over the shop
Image


Trans/tcases going in. Since I had the tunnel cut out already, we used a come-a-long hanging from a piece of tubing stuck through the doors along with a floor jack. We had to lift, block it up, change setup, lift block it up, change setup, etc several times, but it was less of hassle than bolting all of this in in pieces. Pics:
Image


Beer break/change setup:
Image


2:00am, good buzz, dead tired, tcases in, lawn chair installed:
Image


Losing my help for the next month and a half, so progress will be slow since it'll just be me working on it. Next I need to get my fuel system installed, mock up seat mounts, mock up console, measure for brake lines, and bleed hydro assist.
 
#10 ·
Got a lot of little things wrapped up this weekend that needed doing... front brake lines, hydro assist is wrapped up (with the exception of a reservoir), vent lines are on, etc, etc. I also got a couple of steps closer to getting the trans/tcases actually installed:

Tcases pushed as far up as I can do without putting the driveshaft at a bad angle:
Image


Doing this caused the tcases to try and occupy the same space as the floor. I also had some rust that I needed to fix in the floor board where the seat was going to mount... so:
Image


Used 1/8" plate to give me a solid mounting spot for the seats, plus fix the floor
Image


And built a little hump to close in the floor over the tcase:
Image

Image


I have all the brackets made for my trans crossmember, I just need to cut the actual cross member to length, test fit everything, tack it in, and fully weld it
 
#11 · (Edited)
Made more progress, but not a lot of pics.

Friday night, I cleaned up a new-to-me drill press I picked up for a $100 and then added a drill press reduction kit from Rogue Fab (vendor on pirate, Roguefab.com). With it on the slowest setting, the drill press turns 50rpm which is awesome. You can speed it up from there for smaller bits, but its nice having the correct range for metal. And a drill press is a huge time saver.

Pic all cleaned up with the reduction kit:
Image


Moved on to working on the trans mount on Saturday. Unfortunately I didn't grab any pictures, but I got the trans/cases finally mounted and in. Brian (BrianZ71) changed the fittings out on the transmission to AN fittings and ran my cooler lines and mounted the trans cooler. I bought a cooler iwth its own integrated fan that I will control off of a switch. Since a th400 doesn't have a lockup converter, I need all the cooling I can get.

Cooler mounted:
Image


We worked on some other various things as well, just didn't grab a whole lot of pics. I never was happy with my power steering cooler mount, as it was only holding the cooler from one side and allowed it to flex quite a bit, so Brian built another little tab and I welded it on to support the cooler better.

Also built a mounting plate for my powersteering reservoir (once again, no pics) to old it next to the radiator on the core support.

Then we moved on to mocking up the seats. In the pics, the seat looks high, but it is the same height as stock blazer seats and I still have plenty of headroom. I had to build some mounts to bolt the seat to, that would then adapt to the sliders I have for the driver seat. Then I built a seat frame out of square tubing, 45ing the ends so there is no open ends of the tube. Fully welded and ground the outside welds down so it looks like a single piece. I still have to build the frame for the other side, which will be a bit more diffcult due to the hump in the floor for the tcase, but its not a huge deal.

Pics:
Image

Image
 
#35 ·
Moved on to working on the trans mount on Saturday. Unfortunately I didn't grab any pictures, but I got the trans/cases finally mounted and in. Brian (BrianZ71) changed the fittings out on the transmission to AN fittings and ran my cooler lines and mounted the trans cooler. I bought a cooler iwth its own integrated fan that I will control off of a switch. Since a th400 doesn't have a lockup converter, I need all the cooling I can get.
I've seen a TH400 overheat and spew hot fluid onto manifolds before, causing a fire. I'd say you're on the right track keeping it as cool as possible.
 
#12 ·
Worked on it last weekend by myself so progress was kind of slow.

Picked up a set of 39.5-13.50R16 Iroks for cheap and threw them on for shits and giggles:
Image

Image


Gonna have to cut some sheet metal for sure:
Image


I finished building my driverside seat mount and got it painted:
Image

Image


I started work on the other seat mount and got it mostly welded up and almost ready to go together, but forgot to take any pictures of them complete. Since it was me and I wasn't in any hurry, I've been working on being as precise as I can and making my fitup perfect on pieces... I.E. passenger side seat mount:
Image


I snapped a couple of other pics of stuff just to update the thread with. I also cut out the rusty spot on the driverside floor and welded in a new 1/8" panel to mount my seats to (you can see the panel in the picture of the tcases and mount):
Image

Image


I built the transmission mount with one side fully boxed in and one side open in hopes of making removal a one-person job. With the passenger side open on the bottom, you remove the bolts, and the trans mount just swings down out and can be removed. If the bottom was closed in, I would have to raise the tcase up 3-4" to get the crossmember out, and I don't have the room since I have tucked my tcase up close to the floor. Not super happy with the trans crossmember. It will work, but I can build something better. Will eventually redo this or modify it when I do the belly skid

Also set the finished seat/seat mount in for shits and giggles. Its going to be tight getting in and out because of the high sides of the Corbeaus, but you can slide them all the way back and its not to difficult. The seat probably looks high in the picture, but it is the same height as a stock seat (same as my 87 k5 anyways). I also wanted the seat to be as high as possible to increase visibility out over the hood. It won't fit any 6'5 guys, but as long as you are around 6', you have plenty of head clearance, even after a cage is added.
Image


The blazer came in a little under 7ft to the top of the room (think its about 83"), and its 25" to the lowest point underneath. Pretty happy with it overall. If and when I go to 42s, I may redo the suspension a bit to bring it down some, but that will be down the road. Its actually come down a bit more since I've been adding weight back into it. I still have to put the tank in and modify the front shackle hangers so the ride height will come down some more.
 
#13 ·
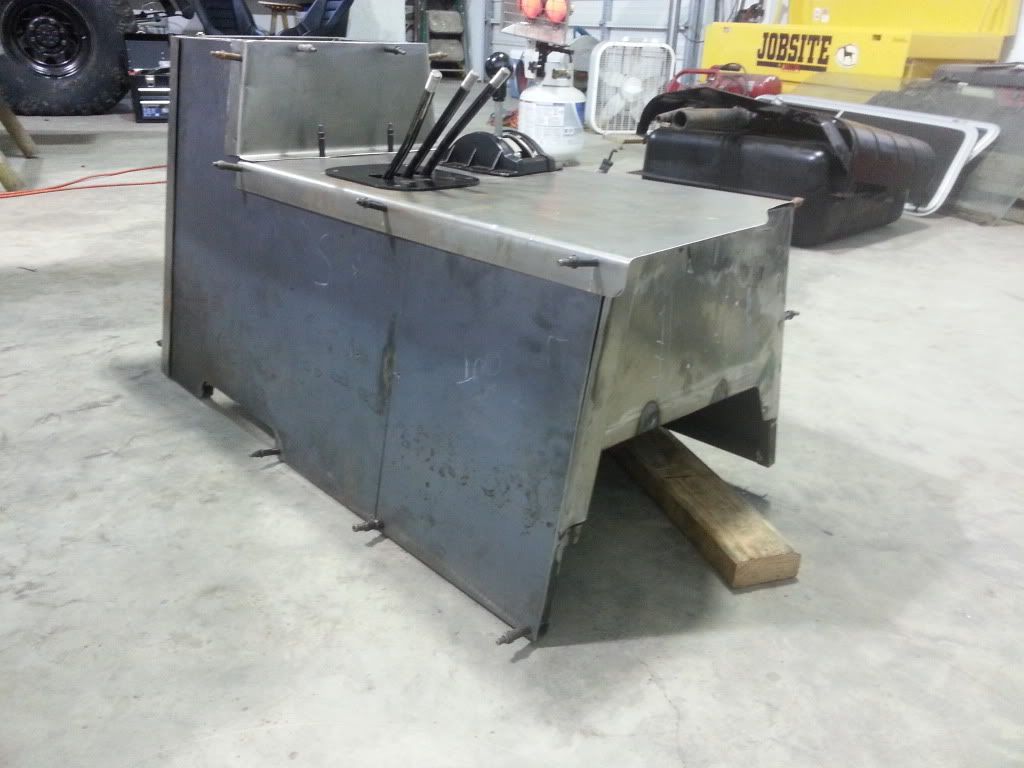
Not much to update on. I haven't been able to work on it since mid August. I spent most of the weekend working on my truck and catching up on maintenance items, but did get a chance to work on my center console. I still have to get the cutting brake put in, and finish out an arm wrest for it. Then I'll have panels CNC plasma cut for it to finish it out. ended up cutting them myself I'm also planning on locating all my fuses and relays for all the electrical behind an access panel in the console.

Image


The back section that is higher will be carried forward to create an armrest. Probably will make the top hinged and make a storage area under it. I also plan on locating the cutting brake between the tcase shifters and trans shifter. Trying to make sure it doesn't really get in my way of the trans shifters. I'm trying to make it easy to do front digs... I'm going to have the rear output connected to the shifter closest to the driver. Plan is to be able to easily disengage the rear, unlock the (in the future) ARB, grab the cutting brake, and make a turn. Trying to keep it all in a close area just to ease the "process"
 
#14 ·
Made a little progress this past weekend. Was a great weekend so I made a last minute decision to go home and work on it. Got all of my shifters mounted up, hard lines ran for the brake lines, measured for my braided lines, and made up my electrical panel that goes in the console. Also put new bumpstops and HIDs in my truck... so fairly successful weekend (other than getting metal in my eye and having to go to the doc yesterday, and getting stung twice by red wasps).

Video of the console sitting in there. The shifters are just loosely mounted, and all the cables and connections to the triple shifters are just hand tight, hence how sloppy it is right now. WHen it is all tightened up, there is no slop at all. Can't say anything but good things about NWFab.


Picture of my electrical panel/plate. Each hole has a 1/4-20 nut tacked to the back so you don't have to use a backing wrench. On non critical items, I'm trying to stardardize on 1/4-20 bolts because it makes it easier to take stuff apart and less guessing involved on the wrench/socket size.
The top 5 and bottom 5 holes are for relays (so space for 10 relays). The middle 4 are where my fusebox/distro block (can see it in bottom left of picture) will mount. Then I have two more where I am using a buss bar type of thing to trigger some relays with key-on power (gauge power, efans, etc). The fans will also have a switch wired in to turn them off, but I want them to default to on. Anyways:

Image


I ordered all my braided lines yesterday from Crown Performance. I don't want to speak too soon, but so far it has been a great experience. The salesman sat on the phone for 45 minutes or so while we went over all the random fittings, lengths, etc that I needed. I needed a feed line from frame rail to cutting brake (26"), two lines to run from cutting brake to each frame rail (31.5"), and 2 more lines from each frame rail down to the axle (31"). Total cost was $146 for all 5 lines. Pretty cheap considering they are completely custom lines. As long as the product matches their customer service, I'll continue to go to those guys from here on out.
 
#15 ·
So lets see.... time to update. Trying to figure out what my last update was.

Been wrapping up odds and ends on this thing when I can. I finished up my wiring harness for the taillights and fuel pump. The original harness was broken and had exposed wires all over the place, as well as the previous owners hack job wiring for who knows what. The original harness also had all the wiring for the window in the tailgate. I have stripped the window/motor/etc out of the tailgate to lose some weight. Oddly enough the power window motor, regulator, and window were all pristine condition, which cannot be said about the window in my white K5. It barely rolls up, and the window is scratched badly, so all of this stuff will get repurposed to fix my white K5s power rear window.

I ripped it all out all the way to the bulkhead connector at the firewall and started fresh (ish). I cut the wires about 8" from the connector and soldered and heat shrunk my new harness on. To make things easy, I used a 4 wire trailer wiring roll so I didn't have multiple individual wires. One night I was browsing random crap on amazon and bought a weatherpack kit (Weatherpack Delphi Terminal Connector Starter Kit with Crimper & Storage 162pcs : Amazon.com : Automotive) and a bunch of wire loom so I can do wiring correctly from here forward.. This is awesome to have as you can fix alot of the plugs on GM vehicles, plus the connections are far superior to butt connectors. So long story short, I have built a new harness that is soldered, heat shrunk and has proper connections to last another 20 years.

Then it was on to some door panels. I unfortunately don't have any pics of them finished, but here is the idea:

Image

I am covering them in a little bit of foam and orange and blue vinyl to stick with my orange/blue theme. I'm not entirely sold on the vinyl cover as it doesn't seem to want to stay glued down, and the fact that I really think I like the sheet metal look better.

Then it was on to finishing my damn console that has been taking for ever to build. It has been extremely tedious since all I have to cut and shape sheetmetal is an cutoff wheels and flap wheels. I really want to get a nice brake and sheer in the future for more of this kind of work. I did build a small brake onto my welding table for about $30 in materials a year ago. It isn't perfect, but it works good enough for this job. Anyways, on to the pictures:

I grafted some 20 gauge on to the front of the console to help keep the heat in the blazer in the winter (otherwise it would just be a big open hole. I also am using this as a mounting point for the front. I bent a flap under and gusseted it so I can bolt it in without having to add any more weight or add some other way of mounting it:
Image


Image


And the console buttoned up with clecos. I still have to cut a slot for my cutting brake, paint all the panels and frame, and make a top that is hinged and padded (for an armrest), but all the hard work is done. once that is compete, it will be ready to bolt in for good.


So that gets us about to where I am now. Its just odds and ends to the finish line now. I need to get the fuel tank back in and run my fuel lines, fab up shock mounts, move my front axle forward and put my new shackle hanger in (DIY4x) to fix the shackle angle and bring it down a bit, modify driveshafts, get the exhaust done, and do some misc wiring and it will be ready to wheel.

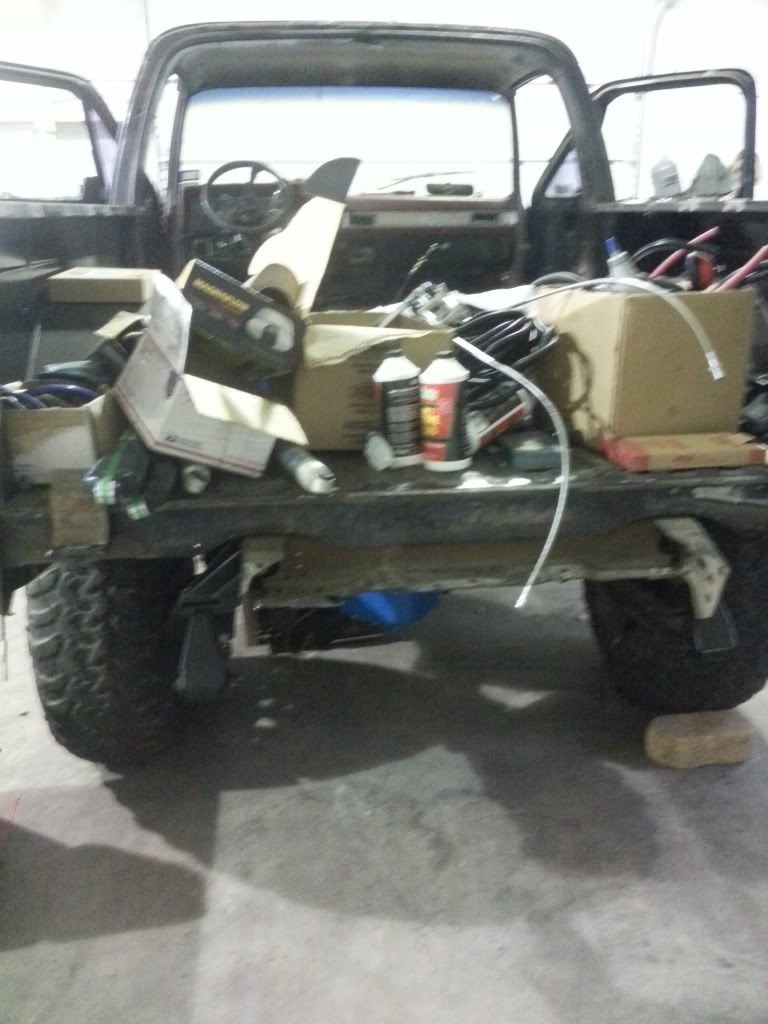
Pile of parts left:
 
#19 ·
Yes, kind of. I am going to take them off, and decided I would let one of my friends take them off. They figured they could just bash them off with a hammer... no dice. I need to put a battery in it and roll the windows up so I can unbolt them. They didn't work very well, were cracked, and would get smashed off on trails eventually.

looks good buddy

good to see local people building some badass rides on here

what style of wheeling are you planning on doin with this thing?
Mainly crawling for now. I'll hopefully be in Colorado starting in May, so lots of trails and rocks.
 
#29 ·
Honestly, I'm not sure EXACTLY what they came out of, but a 90s half ton Chevrolet truck most likely. Although, I think they ran the 63 (64"...whatever) springs all the way up to 2013 at least in the half tons. I know they have them in the early 2000s, and two of my buddies have 2008 and 2010 half ton Chevys that have apparently the same springs from what I can tell.

You can find them super cheap, so if I taco these springs, its easy to find cheap replacements. I think I traded the transmission out of this k5 for the springs +$100-150 in cash.