Pirate 4x4 banner

Project: Monster Buggy

804K views 1.3K replies 373 participants last post by  skipped_Link  
#1 · (Edited)
(edit for no pics) For those not aware of the Google fix for photobucket, you can go here & add an extension to google chrome & see all the linked photobucket pictures again,

https://chrome.google.com/webstore/...tore/detail/photobucket-embedded-imag/ogipgokcopooepeipngiikdkpmcpkaon?hl=en-US

I see a lot of builds popping up here lately & thought I would jump on the wagon,
The name of the project comes from the fact it is going to be a big bitch, especially considering it is only a two seater,

This project first came to light when I came across a decent deal on a pair of 2.5 ton rockwell steer axles, (front loaders), I found them here in the for sale section & they were only a couple hours away to pick them up, A day & 800 bones later & I had them home, & here they sat for a few months one out in the yard & one in the shop getting the stare down,
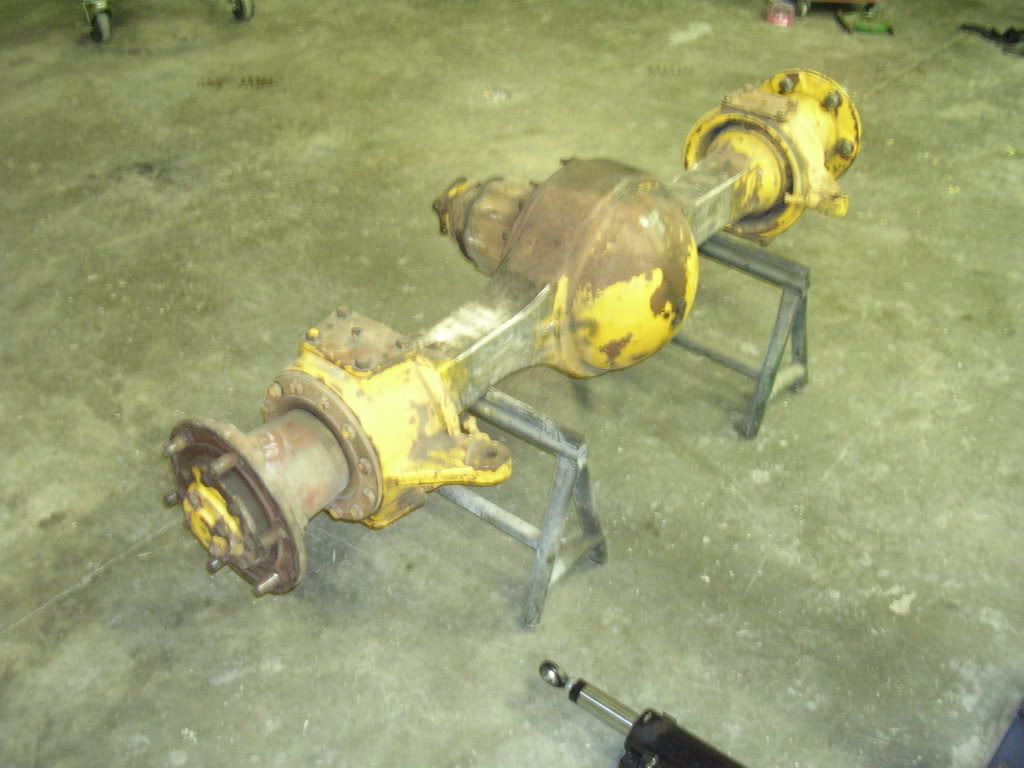
After removing the stock mounting bracketry this it what they looked like,
Image


Image


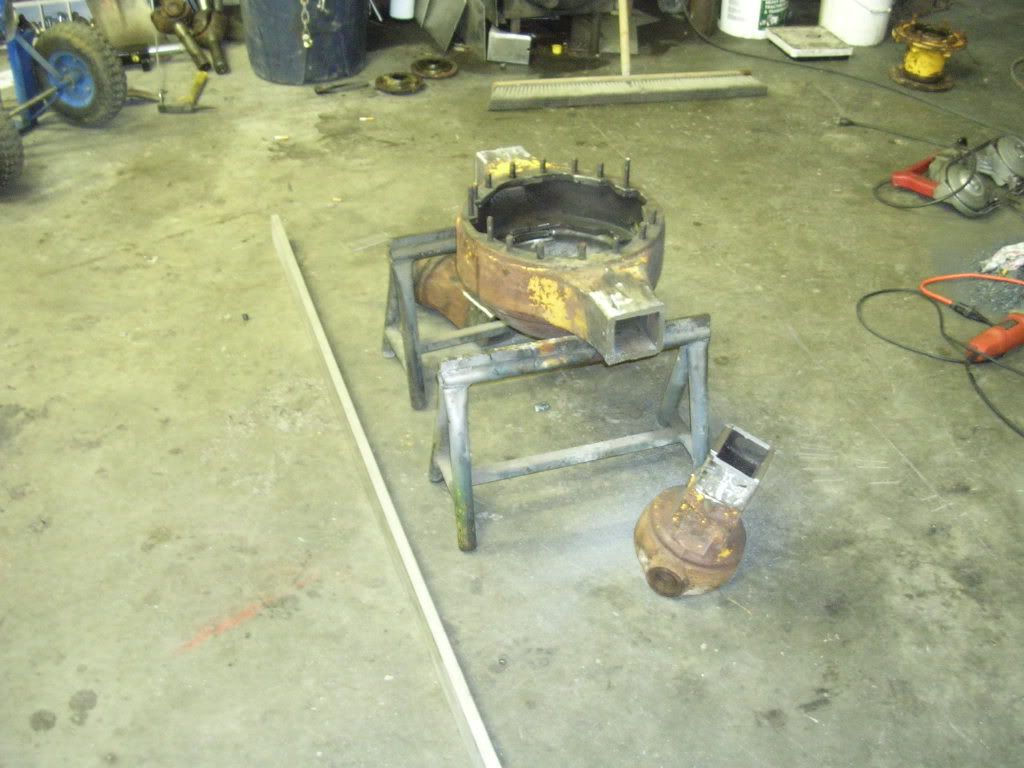
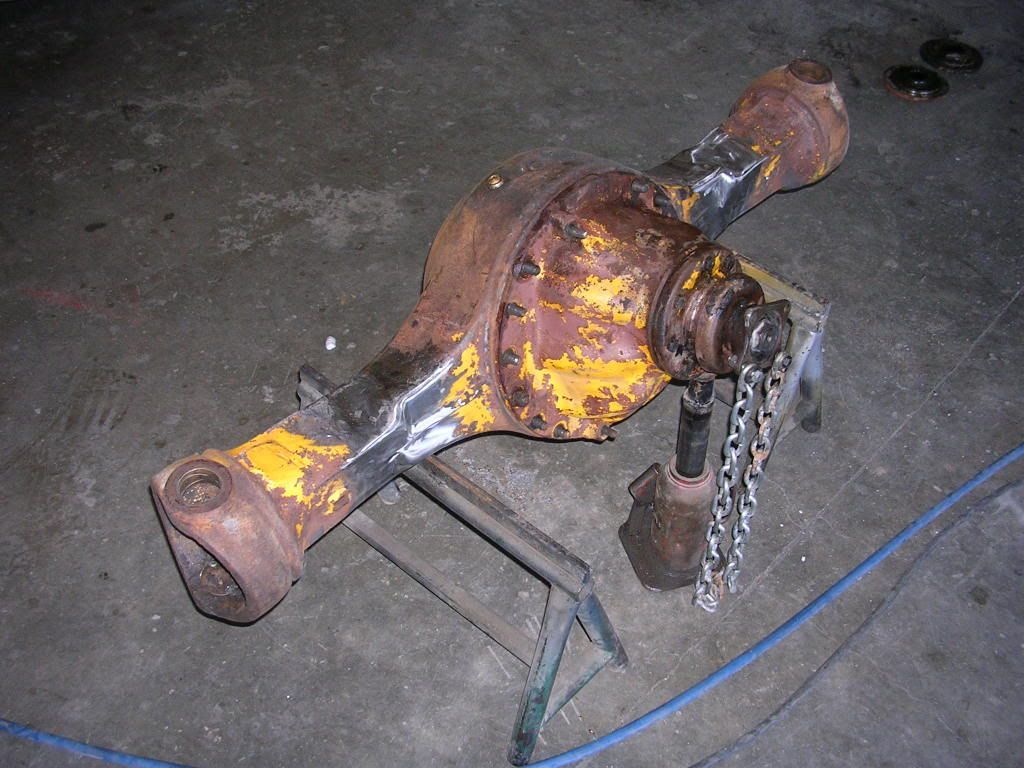
After bracket removal I decided that the front diff would need rotated for better pinion\caster angle,

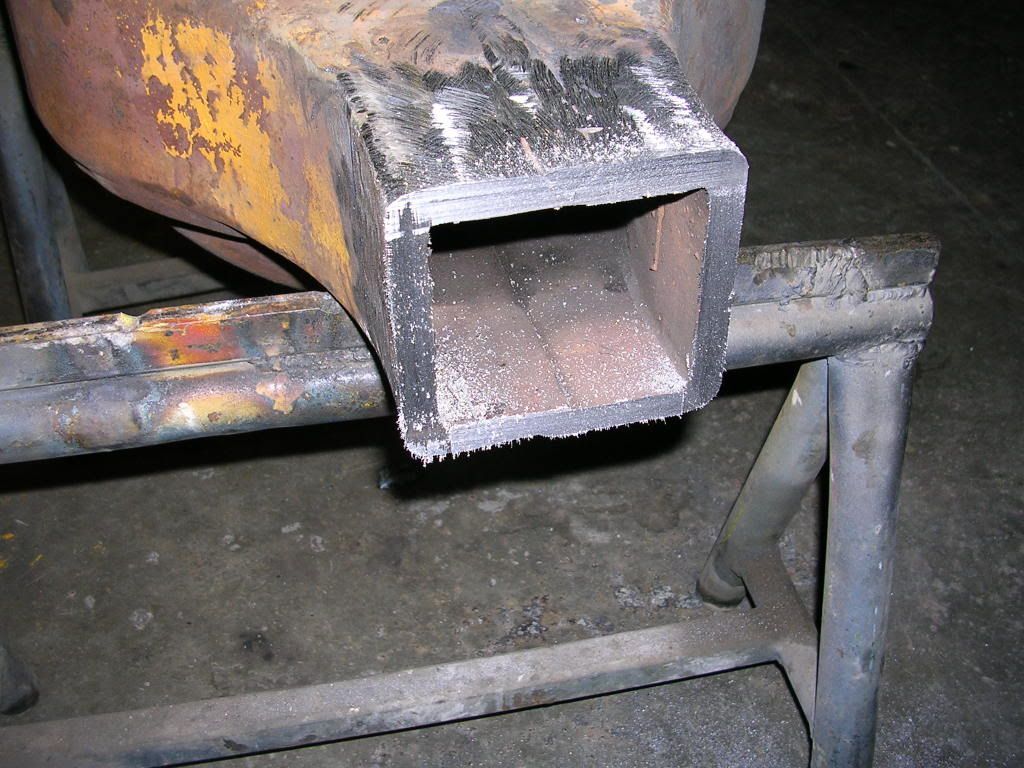
After disassembly the ends of the tubes were cut off,

Image


Image


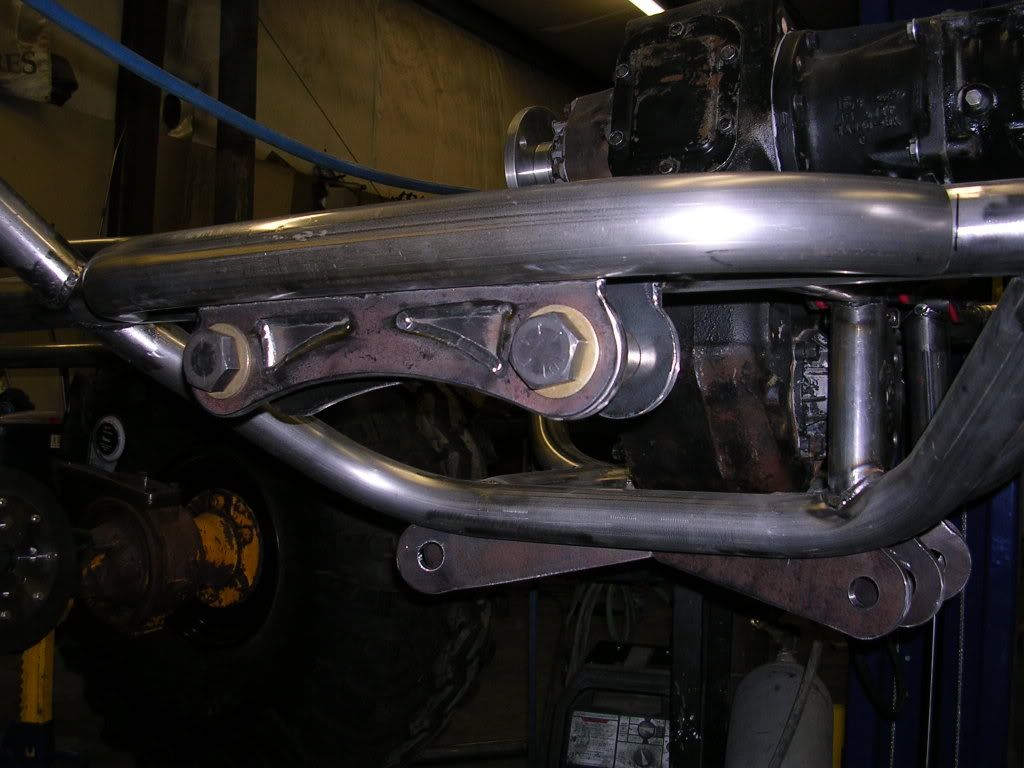
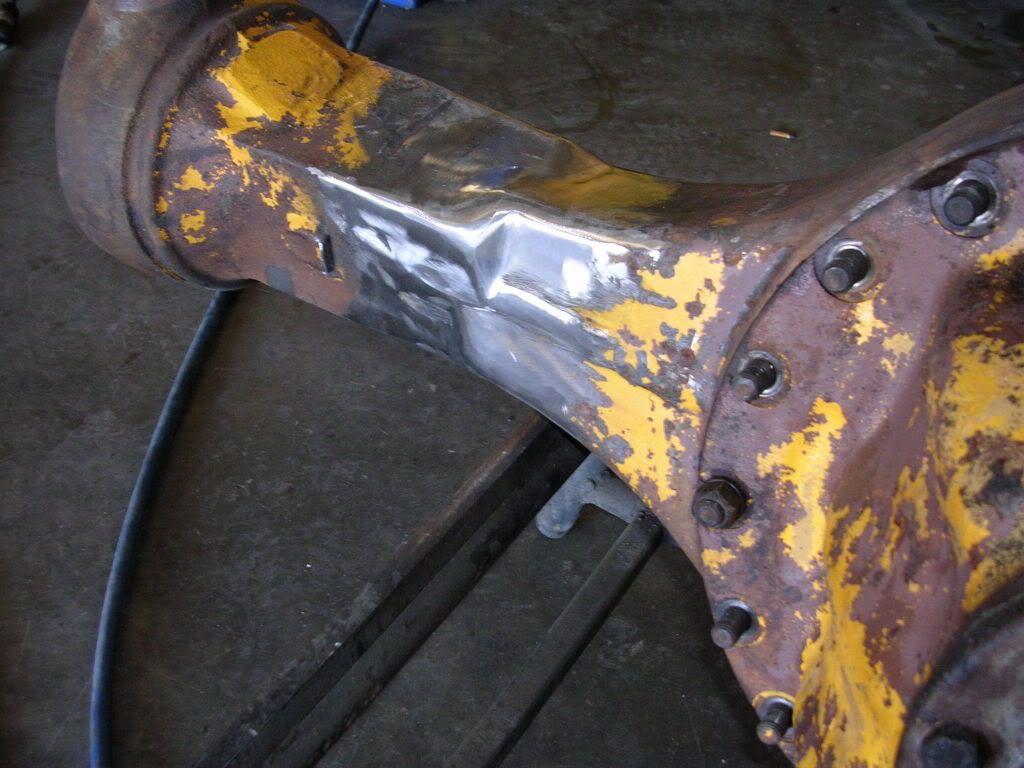
And after some carefull measuring & alignment I welded them back togeather,
Image


So now with the knuckles sitting at 0* caster the pinion is pointed up at 20*

Image


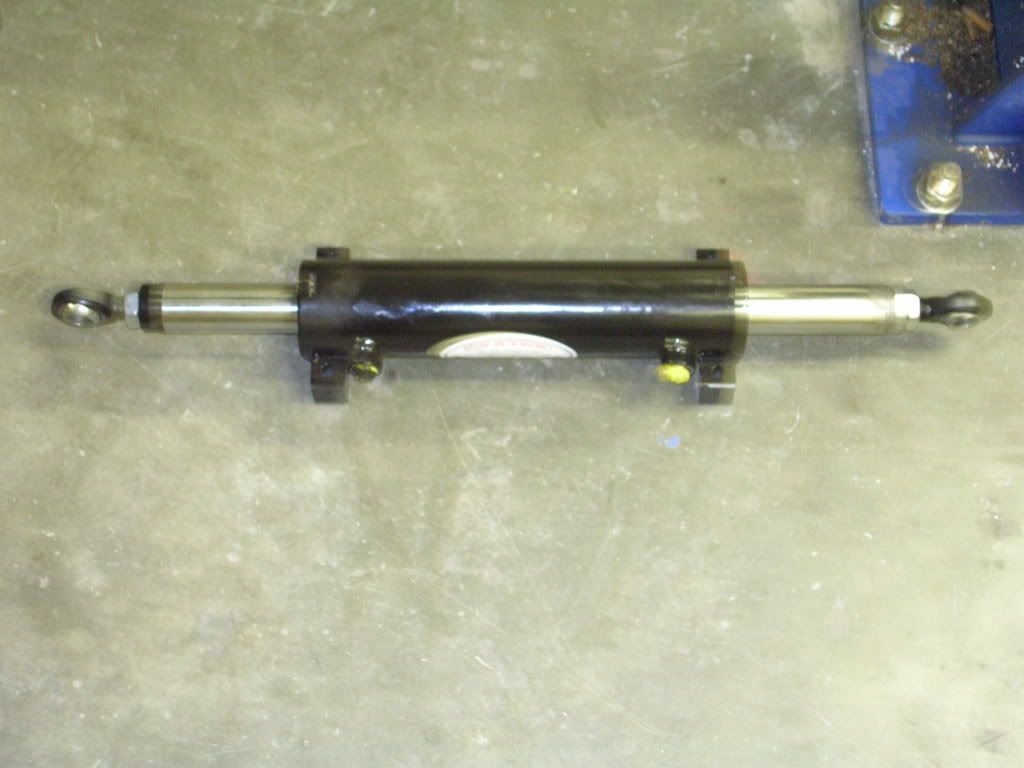
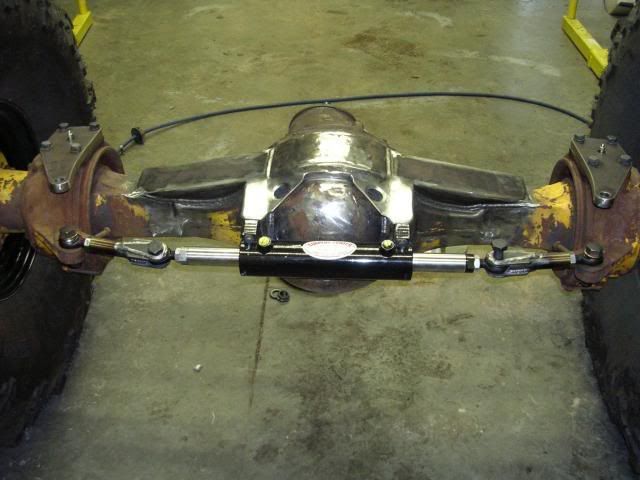
Next was the steering, I ordered a pair of these, one for the front & one for the rear,

Image
 
#2 ·
I did not get many pics of building the cylinder mounts, but I did get a couple of building the tie rods,

Image


Image


& here is the cylinder mounted & the tie rods in place, also in this pic you can see the high steer arms that I built, when complete the will be a spacer between the high steer arm & the tie rod, so the rod end will be in double sheer,

Image


These diffs came with absolutly no brakes, none on the wheels or the pinion, I figure they must have been on the t-case in whatever machine they came out of.
So brakes needed to be installed,
Here is one of the rotors & the beginning of a rotor/driveline flange adapter,

Image

Image


Drilling the pattern for the rotor to bolt on & the two different flanges,
Image


Parts bolted togeather,
Image


Next came the claiper mounts, I chose GM 1/2 ton calipers for the simplicity of mounting them,

Cutting parts out

Image


Test fit,
Image


Modified caliper mount welded to my flange,
Image
 
#3 ·
Here are a couple pics of everything bolted togeather,
Image

Image


I guess I should take the opportunity to cover some of the things I already for get to mention, the diffs are currently both open, when complete they will both be welded, the gear ratio is 6.80:1, & this project is going to be a rear/mid engine, so the chunks have both been flipped for high pinion & proper rotation,
 
#16 ·
do the frontloader rockwells have similar specs for strength etc??
Dane
I'm not sure on specs, The Axle u-joints are the same, but the stub shafts are 1.875" dia. 21 spline & the inners are 1.75 19 spline, I'm sure that the housings are similar in strength, the chunk is tha same as the standard F-106,
& the king pins are opposite of the top loader, instead of being on the tube they are part of the cap, so it goes through the knuckle into the tube,
I'll go into more detail on the workings of the diffs a little later in the build,
I have a set of overson 2" shafts that are going to be adapted to fit the rear,


Any pics or design images of what the chassis will look like? .
Unfortunatly all the images are in my head, I do have pics of the begging of the chassis that I'll post here in a bit,

are you running rear engine?
Yes

I trust you still have the '49?
Yep, I'll be beating on it next weekend,


did you narrow them any or just rotate the ends?
I just rotated the end on the one, they were both pretty narrow when I got them, I'll have to measure them and get a WMS,

More pics coming when I get them loaded,
 
#18 ·
As always, top notch work. If you need to make room for the project, I wouldn't mind seeing the '49 parked in front of my shop again :D

So, whats the projected engine for this going to be?
 
#20 · (Edited)
One of my past projects is a 1979 F-350 supercab that I went through from the ground up,
Image


I know, it has pavement pounder written all over it, but because it was a pavement pounder it spent most of the last five years parked in the back yard.
That is until this last winter I swaped in a freshly rebuild 97 12 valve cummins & NV4500 5 spd,
Now it's a pavement pounding tow rig that work real well.
So the power plant for this project will be the short block from that truck,
Specs are,
460 block, 4.140 stroke eagle crank, 6.7 eagle H-beam rods, 30 over KB318 pistons,(501 cubic inch) with 75cc heads compression should be around 9.5:1,
Since removing it from the supercab I had the block strait honed, & freshend it with new rings & bearings, I took the iron D0ve heads off and tossed them in the corner & put on a set of edelbrock aluminum heads with a Victor JR manifold, The oiling system is a modified pump & Milodon 9qt front sump pan, (which will work well since the engine is in the buggy backwards,)

Installing the freshly built heads
Image


Complete long block with manifold & pan
Image


I went with a Lunati voodoo hydraulic cam for easy maintinance, Harland sharp roller rockers, & a jomar stud gurtle,
The rest includes a holley comander 950 tbi fuel injection system (900 cfm) MSD computer controlled dizzy, & a 2" weld up header kit.
 
#23 · (Edited)
A filler plate was cut out of .375 plate to fill the bottom of the belly, then the lower link mounts were cut out of the same material after all was tacked in place this is what it lookes like, (looking up from the bottom)
Image


The upper mounts were a little trickier,
I cut one out of 3/16 plate, then welded it to the lower frame tube spaced in 3/16" from being flush with the outside of the tube,
Image


Then smoothed the weld & put another 3/16 plate over it, this plate is .200" taller,so it goes further up the side of the tube, when complete the outside of the two 3/16 plated will be welded togeather, that with the triangular window they should be similar in strength to on piece of 3/8 plate, only now it will have a weld on both sides & one in the middle, (clear as mud right?)
That is one side of the upper mount, the next side is the same way only attatched to another tube that is bent to give enough clearance for the rod ends & misalignment spacers,
This is what is looks like when complete, (I took these pics before welding the second tube in place)
Image

Image

Image

Image
 
#24 · (Edited)
Link mounts on the diffs are nothing to special, just 3/8 plate cut out to fit the axle tube,

The link bars are 2" .375 wall, if this proves to be weak I will sleeve them with 2.25" .120 wall,
I bought the threaded inserts from spider trax, I could have built them, but it was worth the $$$ to not mess with them,
Rod ends are 1 1/4" Q1A, with 1" through bolts,

Welded around the diameter, + 4 plug welds,
Image

Image


and as of last night this is how it looks,
Image


Image


Image


Image


Updates to come as the project progresses, if anyone wants to see anything in particular just say so, I'll take pics,

Next on the list is building the cage/upper shock mounts, & getting the 2.5" 16" stroke king coilovers mounted.
 
#33 ·
There are 3 very important tools that I use that are not mine, The lathe, the mill, & the plasma table, fortunatly for me they are my dads, & his shop is only a few blocks away from mine, so when I post pics of machine work or plasma cutting, that is taking place at dads shop,
To answer you questions, the table is made by Plasmacam , with a hypertherm 1000, & the notcher is the $60.00 harbor freight unit, some people think they are cheap, but I've done a lot of work with mine, & if it wears out, I'll probably buy another one just like it,


work looks top notch, the only thing that would worry me is brake vulnerability.....
I'm thinking a removable hoop from axle tube to axle tube looping under the pinion should protect the brakes for the most part, thanks for the observation,

Thanks for the compliments everybody.