Pirate 4x4 banner
681 - 700 of 1,337 Posts
Discussion starter · #681 ·
I got a video if the break and a few minutes of getting it before as well if you want it.
Nice video, thanks.

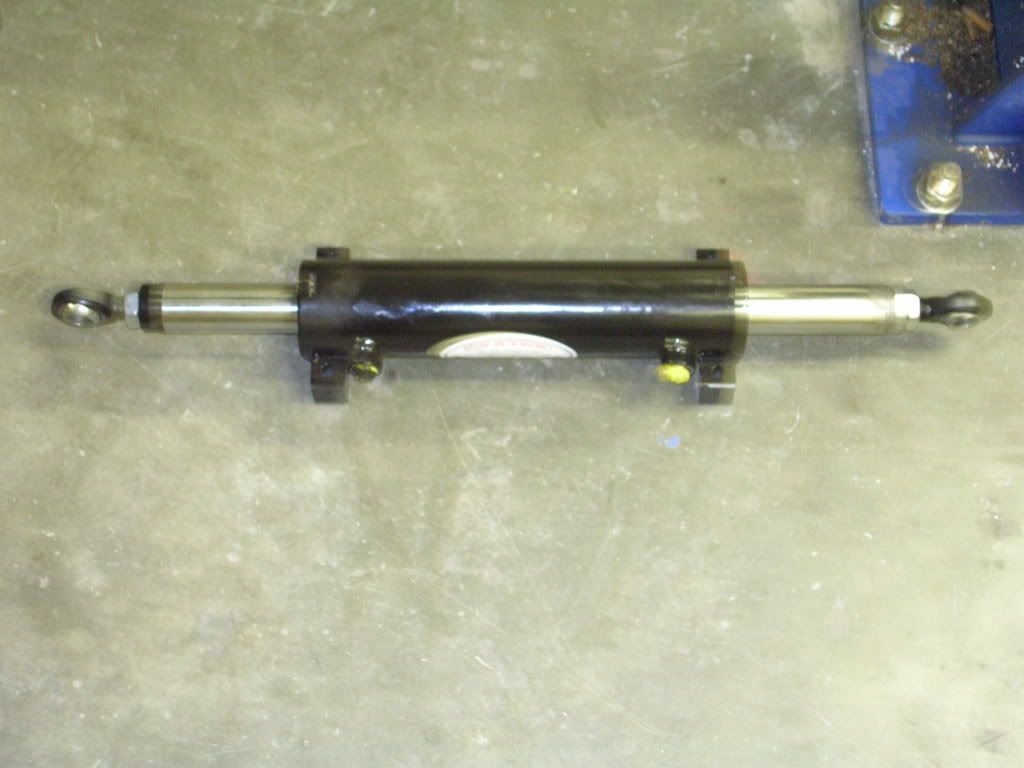
How many degrees will it turn? Hard to tell in pics but the arms look slightly shorter than the stock arms. How long are the rams? 10"s?
Correct, The arms are slightly shorter than factory, the rams are 10" stroke, & with the steering stops removed the rams bottom out just before the knuckles hit the lower gusset on the housing.
 
Just wanted to check my understanding real quick.
The planet carrier fits over the wheel studs and is what turns the tire. The outer ring gear is splined onto the spindle and doesn't turn. Therefore, the axleshafts still spin in the same direction as the tire. Do I have this right?
 
Discussion starter · #683 ·
Just wanted to check my understanding real quick.
The planet carrier fits over the wheel studs and is what turns the tire. The outer ring gear is splined onto the spindle and doesn't turn. Therefore, the axleshafts still spin in the same direction as the tire. Do I have this right?
You are correct,

There is a bit more info & pics of the inner workings of these diffs here in this thread.

http://www.pirate4x4.com/forum/gene...m/forum/general-4x4-discussion/1088531-axletech-4000-planetary-steer-axles.html
 
Why would I be concerned? How would the cylinders be "in sync"? Either you are confused on how the steering works, or I am not seeing something.


Correct, with two single ended 2.5" rams I will have two & a half times the steering power, as one dual ended 2.5" cylinder. And 1.5 times the steering power of a 3" DE ram at the same pressure,

Trust me a 3" DE cylinder would have been a lot less work,
I guess I assumed you would have them run independantly off of the pump and therefore if for some reason one bound up the other would get all of the flow/pressure then since they are tied together with a tie rod it would just be mass destruction with one overpowering the other. But if you are tieing them together where this cant happen then thats understandable, just didnt know how it was plumbed.
 
Discussion starter · #686 ·
Nothing really spectacular to update, just lots of cutting & welding,
I started with cutting all the tabs for the links & coil over mounts out of 3/8" plate, then tacked them in place,


My lower link mounts look pretty low, but they hang down slightly less than the ones on the F-106 diffs, I think it looks worse on these diffs since the center section isn't nearly as big, I would have liked to tuck them up more, but I wanted to maintain 10"+ vertical link seperation at the diff, & there is simple no way to move the uppers any higher without raising the ride hight, which I also do not want to do.

Since I was cutting 3/8 plate, & the layout was set up to cut all my link mounts out of the waste from the wheel centers, I went ahead & cut those pieces out as well,


My current wheels are Stazworks 20x12" double bead locks,


The plan is to cut the centers out at the spokes, leaving the flange & bolt pattern that holds the two wheel halves together,

Then bolt the new wheel center with the Axletech lug pattern to that flange,
After cutting the center out of the stazworks the ID of that flange is 15.375"

The OD of the planetary hub at the mounting flange is approx. 15".
With that much area of the wheel center supported I figured 3/8" plate was plenty for wheel centers.

After cutting the centers out I chucked all five of them up in the lathe, trued up the OD, & bored the ID to fit the centering register on the planet hub. Since they were bolted to one of the wheel hubs while being machined everything should run pretty true when finished.

This was about the max for my dads lathe tho.


Kind looks like these are not the only wheel centers I will be building,
Once everything is installed & I get a little time, I'll be making a set for 24" rims also,
 
Discussion starter · #687 ·
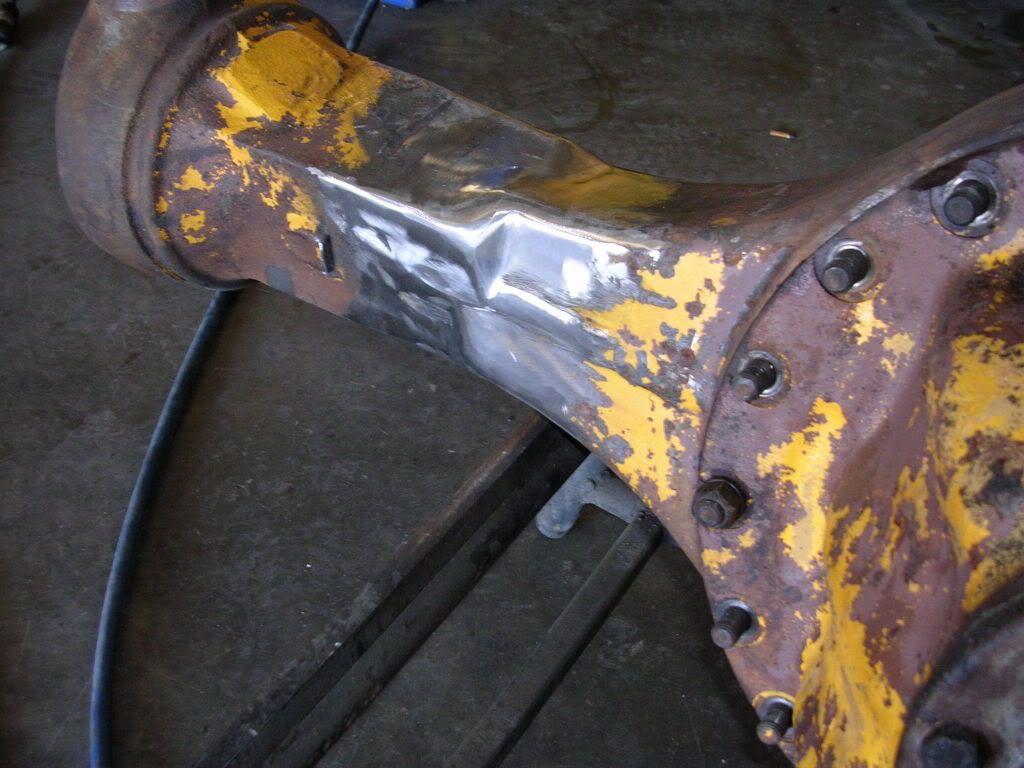
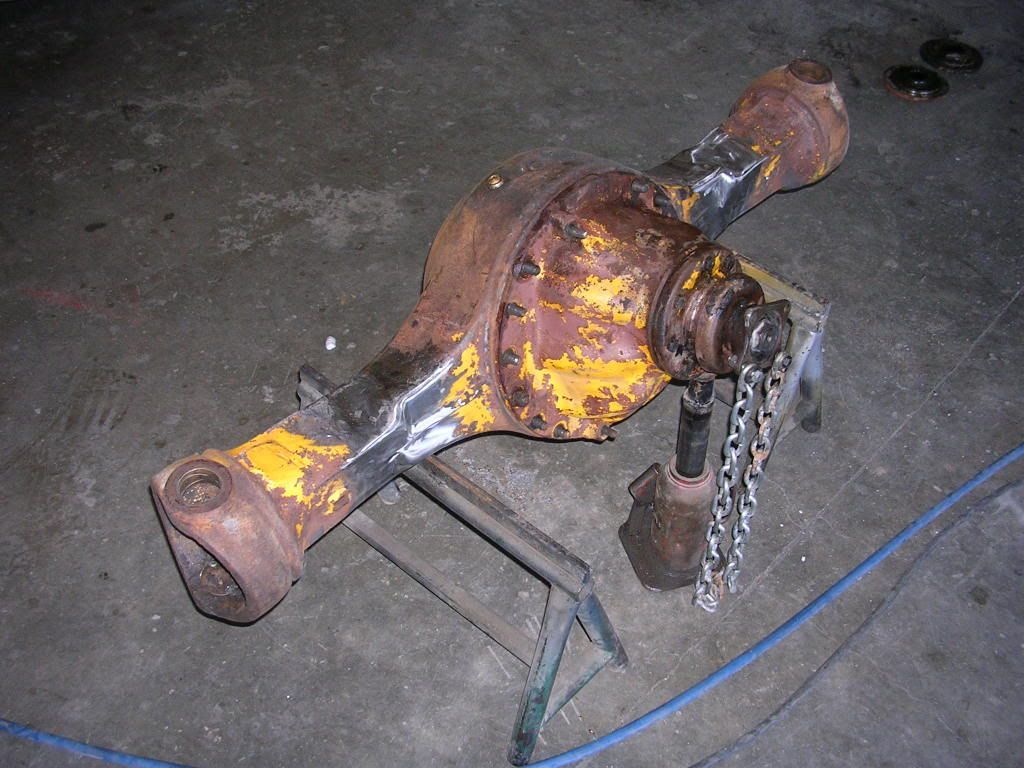
Over the last week I have been talking to friend of mine that works in the welding department at work, brain storming the best way to attach the link mounts to the cast steel housing, I also PM'd Mustange70 on here & run the plan by him (his knowlege on welding materials & procedure is pretty extensive)

The plan was decided to weld the tabs in place with ER70s wire after preheating the housing to 250-300* I was going to tripple pass everything, but once I got going it was obviously over kill for the parts I was working with,
A few things got 3 passes in areas where the added strenth might help, but for the most part one pass seemed to tie everything in real nice,

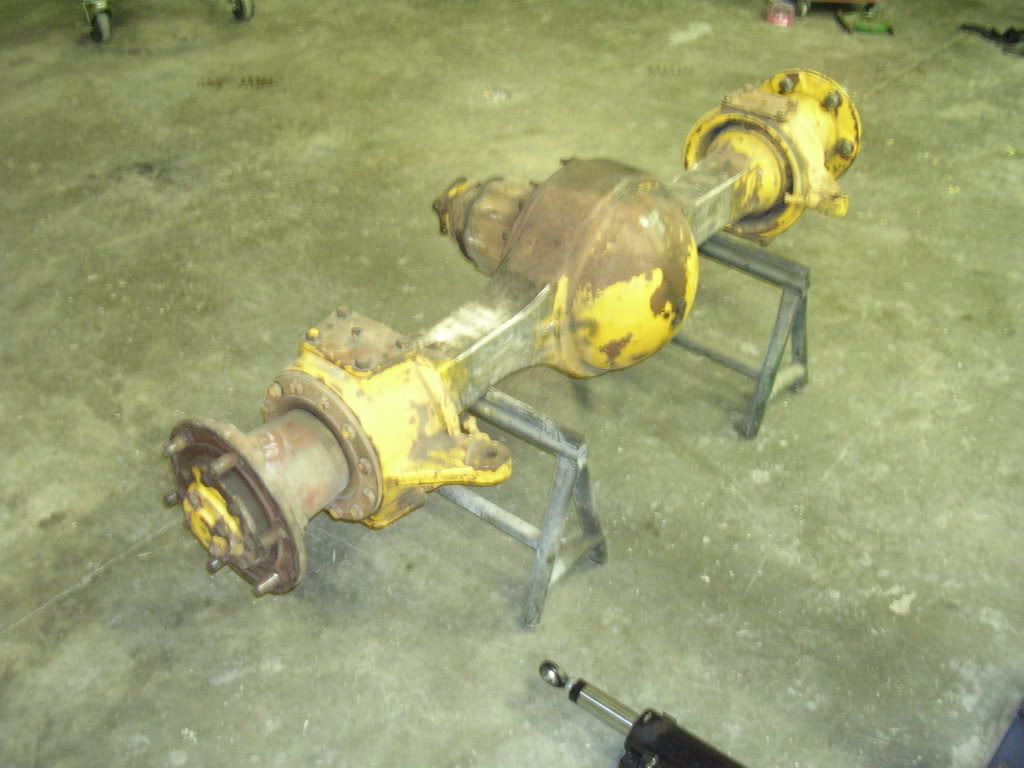
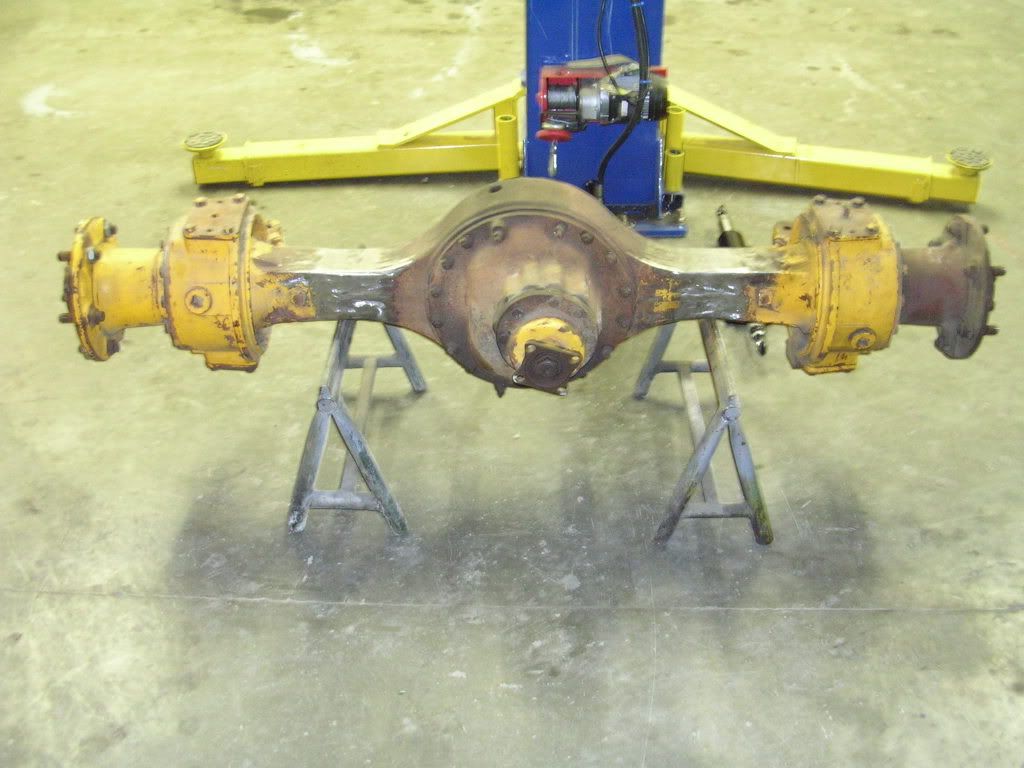
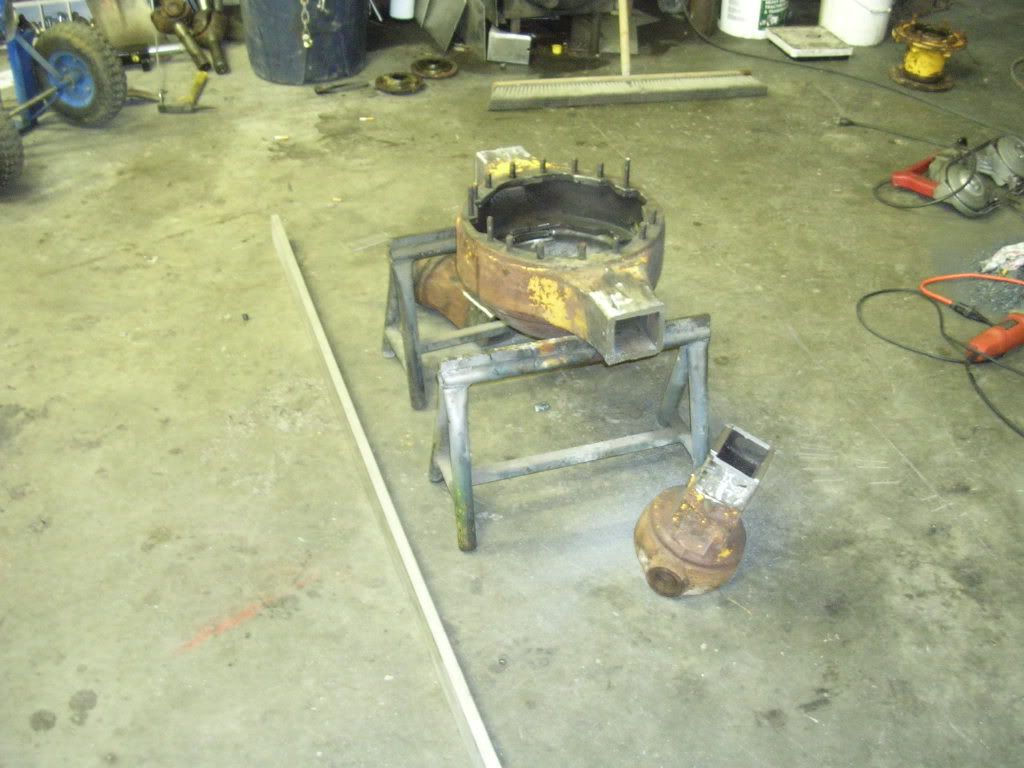
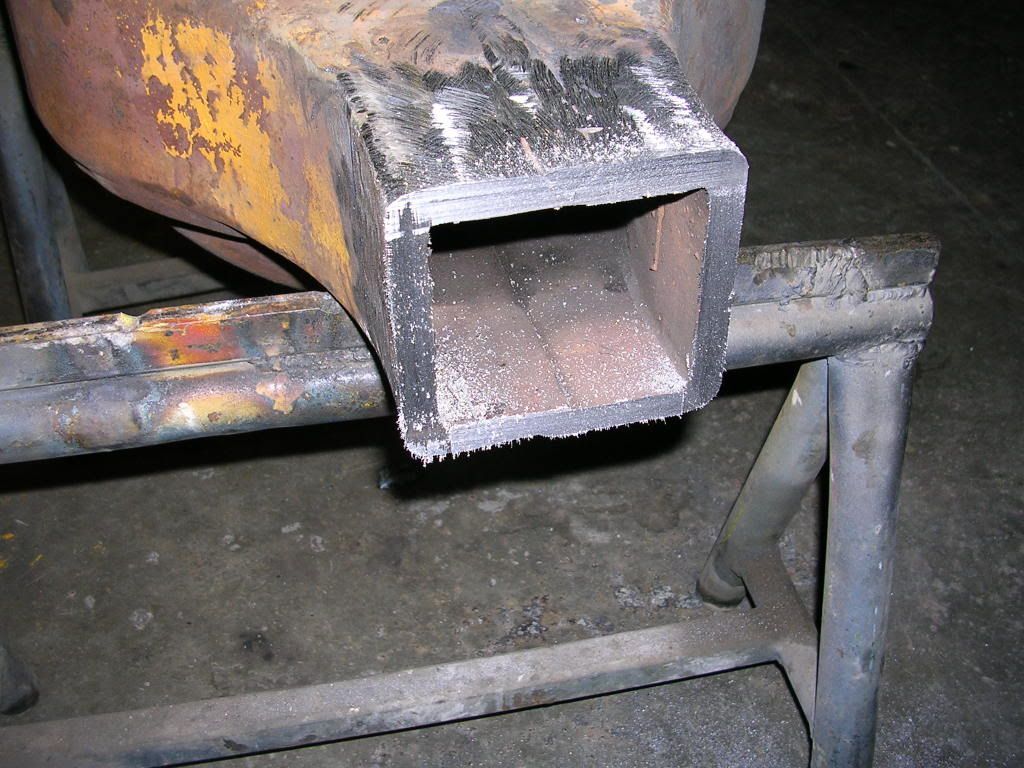
So after stripping both diffs down to the bare housing, I got started.
It took more than just a rosebud on the torch to get this thing warmed up.


I would get a set of brackets & a general area up to temp, then move the burner to another area while I welded, this process seemed to work pretty good, other than at times the heat from the burner would deflect towards me, making for some pretty extreme welding conditions,
But somewhere around 6 hours & 7 pounds of welding wire later, I had a pair of housings with a bunch of crap welded to them,


Once welding was done I covered them with a few blankets & let them cool a little slower,

The next day the housings were cleaned up inside & out, then reassemble out to the spindles with the 3rd member being flipped for the rear engine.


Next days off I'll get the planets installed along with the brakes, then they should be ready for paint,
I'm looking forward to getting these things in the rig so I can move in to the next phase of the update,
The 205 is going to see some pretty seriouse modification.
 
So one thing im not sure has been mentioned is lockout pins for the steering in case of a failure on either axle the ability to lock the wheels straight to get you home....just a thought. Sick build. Only thing I would do better is drop in a big block chevrolet haha .jk not a ford guy but THAT motor sounds wicked. Another question is the winch. I had one of those given to me but kinda disregarded it. Now im thinking about it. Why that winch? Is it because of the narrow design? Another thing, what do you do for a living? Your always talking about your week off. I too have shift work...I operate a gas field
 
Discussion starter · #692 ·
that's a good looking bracket farm!
:laughing:

That'll never work...:D
You're probably right Al, but I think I'll try it anyway :D

Been watching this build since the start, nice work on the current round of mods.
Considering the work I watch on that last project of yours, that's a pretty big compliment, thanks.

So one thing im not sure has been mentioned is lockout pins for the steering in case of a failure on either axle the ability to lock the wheels straight to get you home...
So far I have not needed a lock out yet, so I probably won't put much thought into one now,

Only thing I would do better is drop in a big block chevrolet haha .jk not a ford guy but THAT motor sounds wicked.
That's a bone stock EFI 460 with headers & a computer freindly cam, & that's why I wouldn't bother with a BBC :flipoff2:
Imagine what a few points of compression, a real cam, & about 50-60 more cubes would do, (probably just break more stuff)

Another question is the winch. I had one of those given to me but kinda disregarded it. Now im thinking about it. Why that winch? Is it because of the narrow design?
The Warn 8274 is just a good reliable old winch, they pull pleanty hard & have pretty good line speed,


Another thing, what do you do for a living? Your always talking about your week off. I too have shift work...I operate a gas field
I pretend to be a mechanic at a mine, I work the 5 & 4 schedual,
5 on 4 off
5 on 5 off
4 on 5 off
It's a pretty good racket.
 
Is the efi system a ford deal or aftermarket? I just spent 7 hrs modifying my LT-1 harness for stand alone use. I still have a couple minor things left with it. Even though its alot of work, I would never pay $500 for a painless harness. It really helped with understanding how the injection system works.

Really like the 450r headlights. Maybe throw some HID bulbs in for better lighting.
Still wowed lol....speechless awesome to see what can be done in the garage...now only if my ol lady would allow me that type of budget for my build
 
Is your new lug pattern going to clear the rim stiffener on the outside of the rim? Looks like its gonna be close. I'm sure its nothing a little more trimming wouldn't fix. Sucks having to cut up such expensive wheels, but in the long run its probably the cheaper easier answer.
 
Discussion starter · #695 · (Edited)
Is the efi system a ford deal or aftermarket?
The injection is factory Ford, just like you'd find on any 88-97 460, I thinned the harness myself, & have been real happy with it,

Is your new lug pattern going to clear the rim stiffener on the outside of the rim?
Good eye Jason, yes the lug pattern will interfere with the rim stiffener, but the wheels will be turned around, so that will actually be the inner bead, I'll cut enough of the stiffener out to clear the calipers & brackets, then the new wheel center should pass through without issue,
I will also cut out new rock rings for the outside bead (which is currently the inner bead, & has no stiffener
The new rock rings will also be made so the wheel center will pass through, in case I want to change the back spacing by bolting the wheel center to the other side of the marrying flange of the wheel halves.


Sucks having to cut up such expensive wheels, but in the long run its probably the cheaper easier answer.
I talked to john at SW about new rims, he's not in the market to sponsor a set, & I'm not in the market to buy new, since these wheels were free to me in 2009 even if I were to count my hours & materials in converting them, I'll be less than half of what a new set would cost, so I'm ok with whacking away on them,:laughing:
 
They are a high strength cast steel housing from the research I did, so the limiting factor will be the material strength of the brackets.
 
681 - 700 of 1,337 Posts