Pirate 4x4 banner
541 - 560 of 615 Posts
Discussion starter · #541 ·
There are a lot of pictures of pretty much everything on the machine in this thread. Here is a video.

The difference between this video and the latest Proton Z is the Z axis speed can go well over 200ipm. With Sheetcam we can get into production mode and make the rapid travel Z height as short as the pierce height. So we scream at 150ipm+ down the the safety clearance plane and just before we touch the steel with our OHMIC sensor we slow down. Here is an older video.


If you want specific pictures of the belt reduction units, inside the gantry (hundreds of bolts) or any other specific pictures you will need to send me a PM.
 
Discussion starter · #544 ·
Can you send me some more info on the Proton Z axis? What is the angular compass? I have had a request to bevel cut one edge of some parts for welding.
The Proton is built for the nastiest plasma environment. The twin profile linear rails are equipped with wipers and scrapers and are the large HD type you would see on 10-15hp commercial routers. The ballscrew also has scraping capability and is a double anchored screw (not a single anchor). The Z axis in testing has hit 450ipm but we dial it back for longevity. The motor we couple these with is a hybrid 380oz motor and you don't need to change your amp card to use it. It has a limit switch for over travel in either the UP or DOWN travels. They all come stock with OHMIC (CandCNCs feather touch) and our standard 2 pocket auxiliary tool pockets and router bolt pattern as well as our new MAG-LOKm which has ZERO possibility or breaking a torch but outstanding magnetic holding power. The torch will reset or zero itself from 1" away and the magnets will flip the torch strait up and center the torch. The new MAG-LOKm is amazing.

The Angular Compass will allow you to use your Proton to cut severe angles. I should have a pic of that up in the next few days.

Image
 
Discussion starter · #545 ·
Customer CNC cut his own computer cabinet. This might be the nicest computer cabinet I have ever seen. WOW

Image


Image
 
Customer CNC cut his own computer cabinet. This might be the nicest computer cabinet I have ever seen. WOW

Image


Image
Can't find a page for Thomas Fab & Design anywhere, do you have info on him? He's the same area code as me :smokin:

Like to get in contact with another local company running a Bulltear/Star Lab.
...you know, when mine ships :flipoff2:
 
Discussion starter · #547 ·
I will look him up for you. Like any customer I need to contact him before sending anyone to him. Oh and yours is in powdercoating now. Give us some feedback when you get it in. We NEVER GET FEEDBACK..that is unless there is q question about sheetcam...lol. We got a call today with a question on sheetcam and the owner said he never imagined he would be using the table so much. Some are burning 8-14 hours a day, that's a lot of cutting.
 
I will look him up for you. Like any customer I need to contact him before sending anyone to him. Oh and yours is in powdercoating now. Give us some feedback when you get it in. We NEVER GET FEEDBACK..that is unless there is q question about sheetcam...lol. We got a call today with a question on sheetcam and the owner said he never imagined he would be using the table so much. Some are burning 8-14 hours a day, that's a lot of cutting.

Will do. I recently added your Facebook page for tagging photos (with written feedback of course) - do you have a preferred hashtag designated for Instagram and other social media?

#bulltear (1 tag)
#bulltearcnc (33 tags)
#starlab (1,486 all unrelated tags)
#starlabcnc (0 tags)

I'll throw together a hi res album of table detail shots when it shows up if it'd help you guys. You have some good pics, but I personally would liked to have had more up close stuff when I was shopping.

I'd love to be able to have that much cutting do to eventually! This table will hopefully be the stepping stone to full time self employment in the coming years.
 
I don't know if poster above was looking for a website, but his phone number is right there on the cabinet.

I'm looking forward to mine too Matt. I was just sitting looking at the pictures of the "new standard equipment" :smokin:

cant wait
 
Give us some feedback when you get it in. We NEVER GET FEEDBACK.
I picked up my 6x12 in Sept/October, but I'm just at the point of using it. I made my first cuts in the past few days. I'm super excited, and certainly have a lot to learn. Regarding feedback...here are a few things that crossed my mind when setting mine up.

1) I felt an adjustable water level was the only feature offered by a competitor, which the Starlab table didn't have. I added 55 gallon plastic drums under my table, for an adjustable water height/ability to drain my table. It would have been AWESOME if the lower crossbars would have allowed a 55 gallon drum to fit between the crossbar, and the top support rail. ;) I ended up lifting my table to get the barrels under there. I'll probably end up cutting a section out of the lower support beam, and welding some flanges in there so the section can be bolted in/out for barrel removal. In the photos it looks like the barrel will slide in there...but trust me, it wont. ha

It would also have been handy for the drain bung/pipe nipple to be shorter (the shortest possible threaded nipple). I can run PVC up to a short nipple, but having a long nipple means my ball valve is at/below water level when the barrels are full. I didn't want to deal with cutting the nipple off/shorter, and trying to re-thread it.


2) While discussing the water drain...I used a dremel to create a small shelf/recess on the top of the drain bung. I placed a small sink drain/strainer into this recessed shelf, and silicone-d it in place. It works well to keep larger debris out of the barrels, and in the top of the tank. Easy to pull out and silicone a new one in, if I need to do so. Of course, I realize this means only fine particulates/sludge will be reaching the water barrels, and settling in them...I'll have to cross that bridge when I get there. LOL


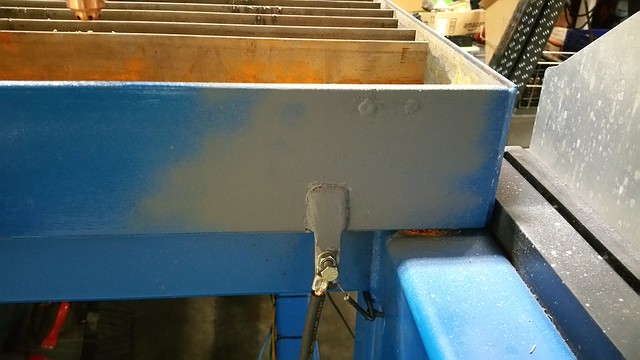
3) The existing ground bolts (tapped through water table side) seemed like a bad idea. I didn't want the water to fill up above these holes/bolts. I welded the existing holes closed, and added a tab off the water table to attach the work lead/ground.


4) I think I'd like to have the option of running the water all the way to the backside of my material. With the slats being the same height as the table sides, I can't do this (without risking overflow, anyway). It may be nice to see if the customer wants the slats to be flush with the water table sides, or have the slats cut shorter, so the water can rise all the way to the top of the slats, without reaching the top of the water table. When I cut new slats, I'll probably cut them a bit shorter for this reason.

5) Possibly offer a CD/folder on the computer, with a backup of the installed software parameters/files. That way, if someone happens to fubar their Mach setup while trying to install the HyT upgrade, they can simply copy/paste all the original setup files into the Mach directory. ;) Mach will then be just as it was when it left your shop! Of course, any normal person would realize they should make a backup of these folders before dicking with them...but...a backup CD/folder would sure help some idiot who does NOT back up before making changes! lol

6) Videos. It was awesome to meet with you at your shop, Matt, and have you go over the table with me. You are extremely knowledgeable, personable, and just a shit ton of fun to meet. That being said...I was running on about 3 hours of sleep when I picked up the table, and that was several months ago. Though your training covered everything necessary, my comprehension at the time was...lacking. Even for someone who would be on top of their game, it's a lot of material to cover.

I've found a competitors training video set to be VERY helpful. I've downloaded/saved to my computer all the Arclight training videos from Youtube. Mach, Sheetcam, Inkscape, index cutting, etc. Over the past few days, I've been watching these videos while following along on my machine. These videos are like attending a Mach/Sheetcam seminar. VERY helpful to have at home.

7) Computer wouldn't boot if I had a flash drive in the USB port. I went into the computer BIOS, and changed the boot sequence so that it's booting from the HD first, and not trying to boot from the USB (or CD) drive.

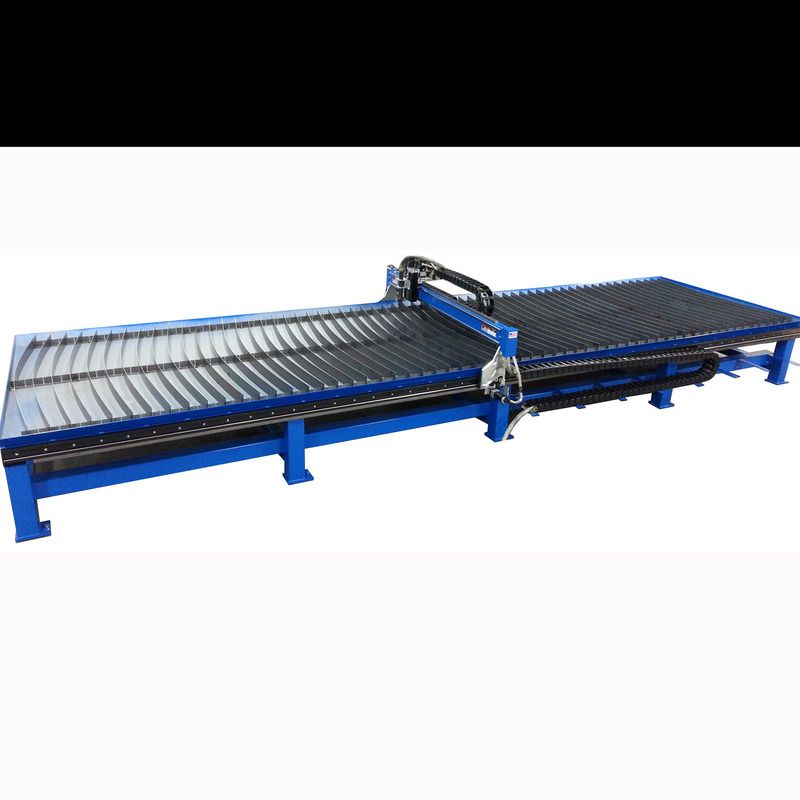
Though I've just started using it, I'm extremely pleased with my Bulltear/Starlab table, and my choice of vendor. It was a blast to meet you/visit your shop. Seeing your facility, and your capabilities (how many VMC's were around that place? And the big gantry CNC mill? The plethora of precisely milled parts for your various product lines) made me feel VERY confident in the quality of the table, and the fact that it is an engineered, precisely machined unit. I've found several people who are putting their Bulltear/Starlab tables to great (and profitable) use, and I'm trying to learn from them (_Ogre on PS, for example...he may be here too). I feel that the table will be able to do anything I ask of it, and the limiting factor will be my knowledge base.

After stumbling across a recent BurnTables thread, I'm EXTREMELY grateful to have the table quality, and support that comes with a Starlab/Bulltear unit. I think the table is top-notch. I thought the price was very reasonable, particularly considering the things that come 'standard' with the table...Ohmic sensing, magnetic torch mount, water table, mounting spots on Z axis for auxiliary items (scribe, engraver, etc).

Enough for now. Time to get back to cutting, and learning the table. I've been unhappy with the quality on some small arcs and circles on a part I've been cutting (_Ogre's laser crosshair mount, to which I added a clamp for the Supereyes 005 camera for Scananything). I guess it's time to try my hand at creating some cut rules, and see if I can measure actual cut height to see if voltages need adjusted.
 
Discussion starter · #559 ·
Good points

1. The only long term solution is a plastic water containment or stainless one. Designed so you can scoop out what will accumulate. Having a steel air bladder system tied to the table frame means the entire structure of the table will be shot in the years to come. I like the idea of the air bladder but only a small percentage of customers could utilize one (More as we step forward into routing).

2. A drain would require a way to stop the bigger debris but the smaller finer particles will need to be taken out. When we do move forward with an air bladder a multi size catch will be implemented on the existing 2 inch drains.

3. The existing lug is for the Ohmic and should have had a sealer on it. The change you made was fine as long as its to the waterbed it will work. Ground to bed and a seperate ground to thinner material is always good too.

4. Material in the water can work well with ohmic if the material is not fully submerged. When you hand load combersome pieces you will enjoy a shelf over a legde. So it boils down to the type of cutting and the material.

5. Love that idea

6. Did you find the training videos in the folder on your desktop?

7. It was set up that way for a future LINUX upgrade ;)

Thank you for the feedback
 
Discussion starter · #560 ·
Do you ever wondered what it would be like to take the mystery out of cutting with Thermal Dynamics plasma cutters? Here is the new iCNC control. Bulltear Industries was one of a few hand picked MFGs of plasma tables to take part in testing of the new iCNC. They liked the Star-Lab machines so much they sent us a control, servos and hardware to integrate. This is a surefire way to integrate a 200amp plasma using an industrial hardened control. But it will also integrate to the smaller A series 120amp and smaller plasma cutters.

So far it looks like a nice control head and with all the software loaded.

Image
 
541 - 560 of 615 Posts