Pirate 4x4 banner

Same Thing Diffrent Day TJ 1 Ton Build

133K views 212 replies 74 participants last post by  bddisi  
#1 ·
Here a few pictures of the jeep before the build. It took me awhile to get it as it was here.
Image

Image

Image

Image

The jeep had a hp d30 with chromos and an E locker 488s up front and an 8.8 out back. I had triangulated the rear uppers and three linked the front. I had been wanting to do the 1 tons for a long while and finally said "What the hell". I sold the hp 30 and the 8.8 along with the 36in Iroks and all other stuff that I wasn't going to use and the bought this stuff.
The build begins.
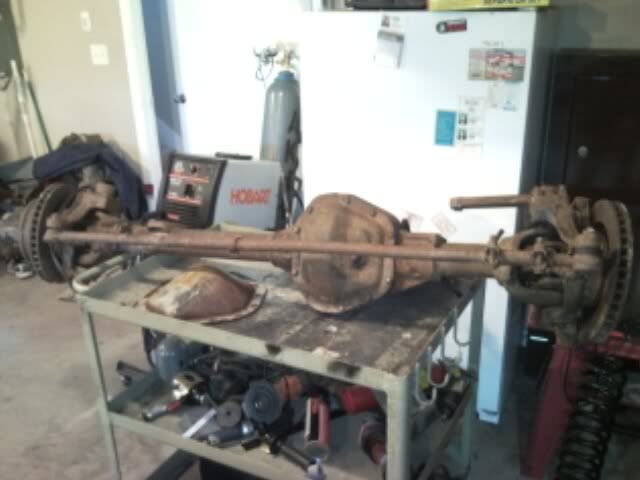
The first things I picked up were a 79 hp d60 and a 14bolt.
Image

Image

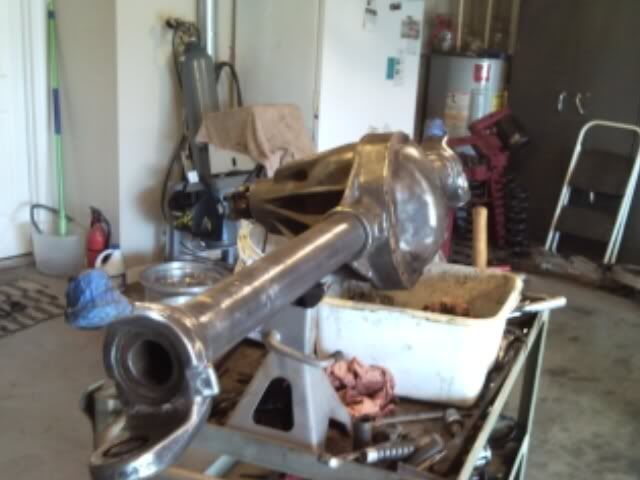
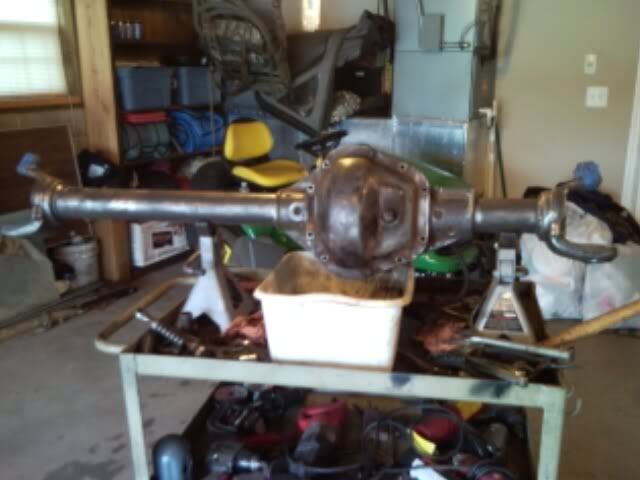
The dana 60 after the wire wheel.
Image

Image

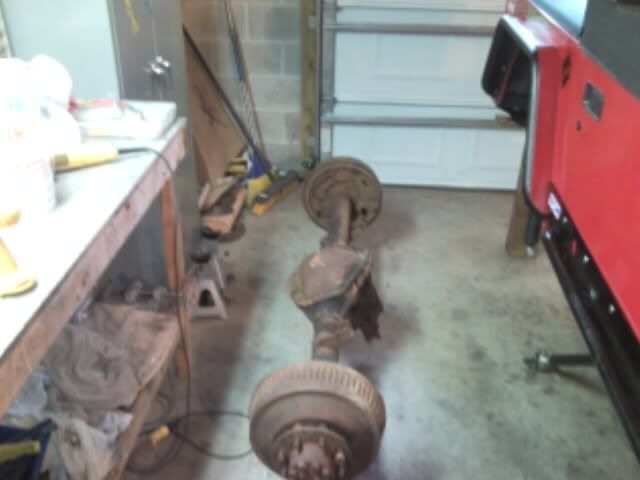
Not knowing how far my budget would allow me to get, I traded the 14bolt for a D70. The d70 had the same gear ratio as the d60, 410. I knew it would be a turd with the 410s but at least I could drive it if I didn't get to change the gears out.
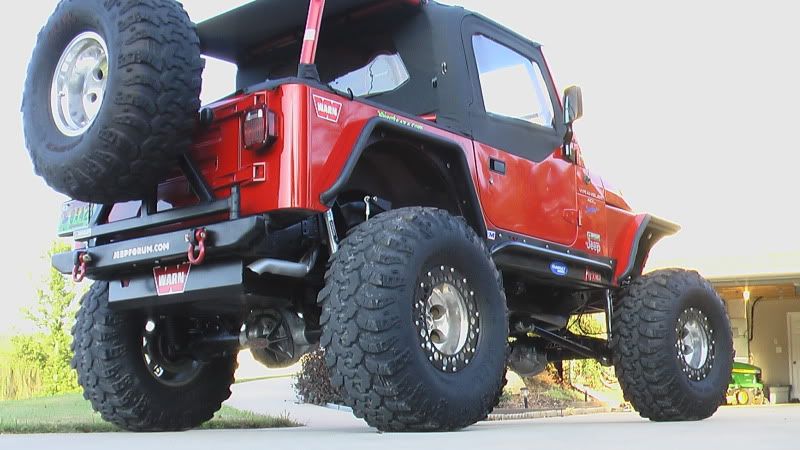
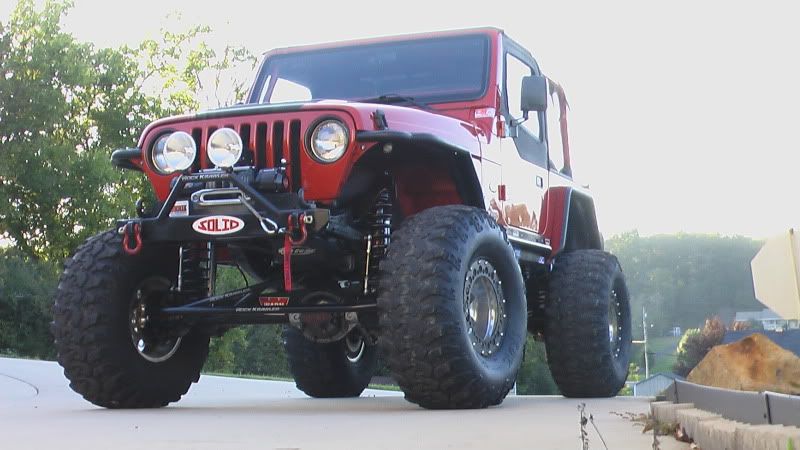
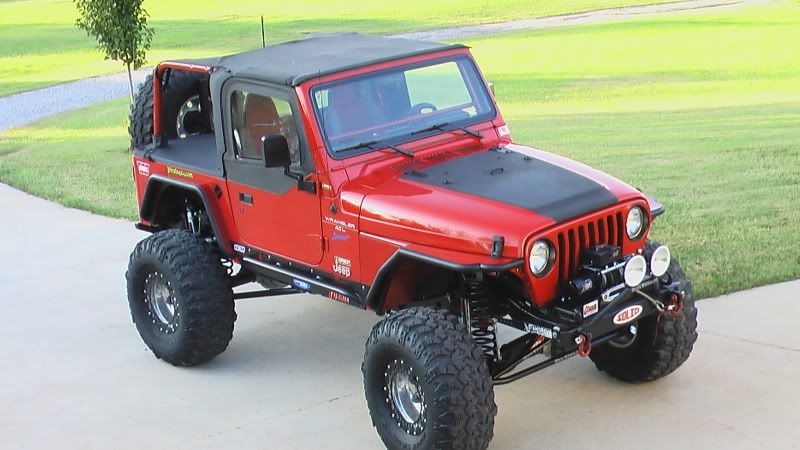
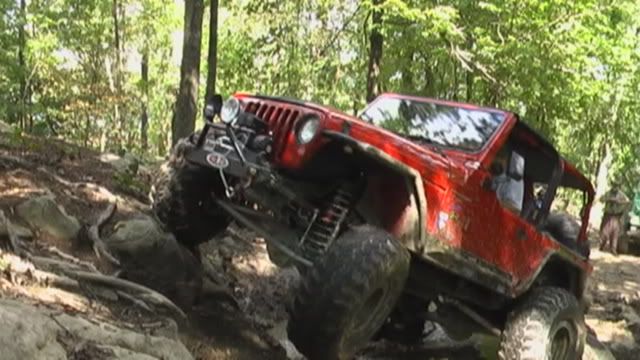
 
#2 ·
Image

Image

Image

So my plan was to get the d60 and the d70 mechanically sound.
NOTE: 90% of you bastards that post these threads don't state the fact that just to get these 1 tons mechanically sound costs a lot. :eek:
Image

Image

Image

Also one of the king pins on the d60 was kinda bad so I decided to change it out. After reading thread after thread, I begun. That thing was a pita. Finally got it out.
Image

Image

While I had the d60 stripped down I cleaned everything up and painted it.
Image
 
#3 ·
I started getting a few things together. I needed to build two new control arms for the rear uppers. The ones I had were not going to be long enough.
These are from Rusty's Off Road.
Image

The uppers would be built from 2in .250 wall dom.
Image

I already had a Teraflex long arm system for the lowers. Here they are with the new lower rod ends.
Image

So I got the d60 reassembled, new brakes and rotors and Warn hubs.
Image

It was now time to address the rear quarter panels. I made a cardboard template and had a local fab shop cut some 3/16 plate to match.
I figured it was cheaper to do this than to pay 300.00 to 500.00 for a similar result.
Image

Image

Image

I was also going to be able to reuse my 3in Smittybilt tube fenders.
Image

Image

No turning back now.
Image
 
#21 ·
Costs... Costs to get them mechanically sound, costs for things I didn't even think of for sure. I am on my second 10lb spool of welding wire, I have went through, I cant count the cutting wheels, I am on my third band saw blade and have shoveled up about two 5 gallon buckets of grinding dust. I haven't even started the brake lines, the fuel line, the gears, the lockers, the tires. Oh, this makes my head hurt..........
Thanks for the comments.
 
#7 ·
Ok, so I finally got a few orders in. One from Ballistic Fab, via Carolina Truggys.
Image

Image

Image

Image

I did a little work to the d60.
Image

Image

Image

I also had to address the issue of where I had outboarded the rear shocks. Luckily I had kept the pieces I had cut out. I welded them back in.
Image

Image
 
#9 ·
The guy I had traded the 14bolt for the d70, had these. 16x9 Champion beadlocks. I got them for 450.00
Image

One cleaned, one not.
Image

Image

So it was now time to give the d70 a little attention. The rear disc brake bracket.
I had to cut off part of what was there and weld the Ballistic brackets up.
Image

Image

Image

Image

Image

Image

Image
 
#10 ·
So then I picked up the dom for the upper rear links.
Image

I also started mocking up the d60.
Image

Image

I had rather build than buy somethings. So I cut out a template from cardboard and started building my d60 truss.
Image

Image

Image

Image

Image

Image

Image
 
#11 ·
Image

Image

I had also put 1/4 plate inside as the lines show.
Image

Image

Image

I used a piece of 1/2 plate under the edge of the spring perch and on top of the cast to bridge and weld the truss to. The 1/2 plate is also welded to the cast.
Image

You can also see the truss is welded to the top part of the d60.
Image

Image

Image

Image
 
#12 ·
Image

Image

Then to do some more cutting.
NOTE: All this cutting crap off and out was done with a 4.5 Dewalt and Harbor Freight grinders. Some with the HF bandsaw. That means, well damn you know what that means, it takes a long frikking time.
Factory track bar mount.
Image

Image

So I stuck the d60 back under the front of the jeep for the 1469th time.
Image

Here is the rear d70 truss mock up, also the rear axle links and etc.
Image

Image

Image

Image

Image
 
#13 ·
Image

Image

Ok here is the bottom of the d70. I wanted to shave it. So I did. I didn't get crazy with it but every bit helps.
Image

Image

Image

I also got the rear upper links made.
Image

Image

Image

Image

Image
 
#14 ·
Some of this stuff may be out of order as to when I done it, but you get the jest of the big picture. So don't break my balls over the dates on the pics.
Image

Image

Image

Image

Tabs for the rear Antirock
Image

I also got an order in from Ruff Stuff.
Image

Image

So when I ordered the heims for the front linkage, track bar, drag link, tie rod, I didn't get the correct tube inserts. The ones I got were to big, so I had a friend turn them down a little on the lathe. This the 1.5x3/8 wall dom for the front. This piece was cut for the fitment of the tube inserts.
Image

The old trusty HF bandsaw.
Image
 
#15 ·
So here is the mock up of the front d60 steering and track bar.
The track bar was kinda a dilemma for me. I wanted it to be parallel with the drag link and to also be of equal length. Here are some pics of the trials.
Image

Image

Image

Image

This is what I ended up with. And the drag link and the track bar are the same length.
Image

Image

CLOSE.
Image

Track bar, drag link.
Image

Frame mount.
Image

With enough clearance for the Antirock.
Image
 
#16 ·
I also put some of these speed holes in the d60 truss.
NOTE: These give you an extra 15hp, the air goes through the holes down the exhaust creating a vacuum effect at the end of the tail pipe sucking out the exhaust, thus the added 15hp.:flipoff2:
Image

Image

Image

Image

Image

Image

Jacked up.
Image

Image

Most of the bolts in the pics are for mock up.
 
#18 ·
Image

Image

Image

Image

Image

Glad I didn't have to move the rear Antirock
Image

This is what I have done with the rear fender flairs.
I cut about 7in out of the rear, and welded it back together.
Image

Image

Image

Image
 
#19 ·
Here is what I did to the fuel tank. I made a box for it and it will go in the back behind the front seats by the tailgate.
Image

Image

Image

Image

So here is how the jeep sits as of now.
Image

Image

The 5.5in lift springs are a little to tall, but I will probably leave them until I get the tires. I at trying to decide between 39.50 Iroks and 39.50 Pitbull Rockers. I would like to go 42s, but I didn't build for that. The wheel base as of now is 101. I can take the rear out a little more, if needed.
More later.........
 
#24 · (Edited)
Nice job man....I know how time consuming and shitty it is to have to cut all the brackets out with the angle grinder. Glad to see you supporting the NC vendors. What brand are those orange bumpstops? I might end up doing the same gas tank box for my blazer if I can get a good free tank.
 
#26 ·
Those were actually black at one time. They came with a Superlift 4in lift kit.
Here are the adjustable bumpstops I am building. Made with 2in 1/4 wall dom and 1in ss all thread.
1in stainless all thread.
Image

a couple fabed up, using factory cups.
Image
 
#30 ·
Maybe so??? But if I had mounted it the other way, then the Antirock would have hit the track bar mount. I think it will be ok once I put this back on there. It is the frame to track bar bracket brace.
Image
 
#35 ·
Thanks
Your jeep was bad ass before you started. Now it is really going to be bad ass. I can't wait to see it done.
Thanks, it was hard to pull the trigger on the swap.
your ideas and building isnt so bad. but the welding is scary man. is it going to be a driver or just wheeler.
the jeep looked pretty nice before as well.
The welding is fine, maybe not pretty, but the penetration is good and I trust it. It will be a driver and a wheeler.

looks good man keep it up!!:smokin:
Thanks for the comments.....