TF999 Breather Vent Relocate How-To Write up
I hope this will help some of you guys out, I was searching all over the web for this info with pictures and never had any luck finding it. This is a write up of how to weld shut the famous "low vent hole" that kills the Jeep automatic transmission (caused from going too deep in the drink), and relocate it to the top of the tranny case. This tranny (TF999) is out of a 1989 YJ with the 6 banger. This will probably work on other trannies as well.
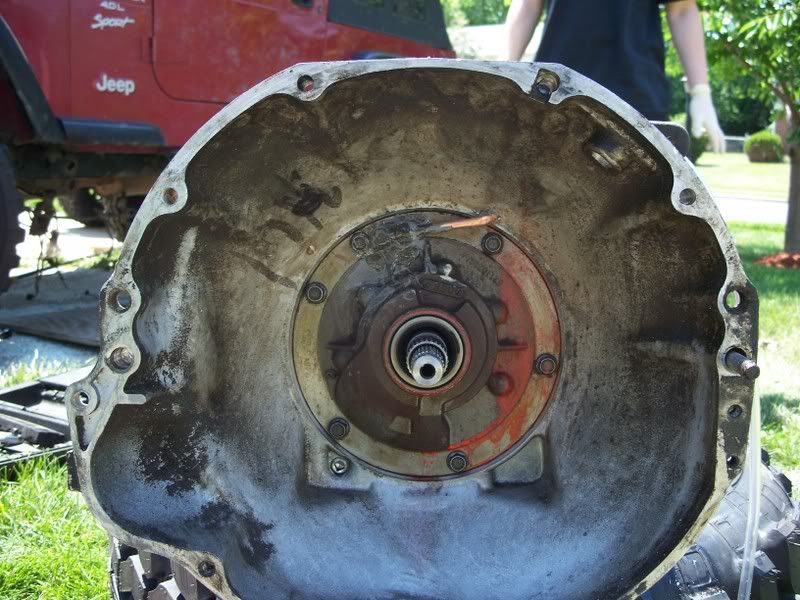
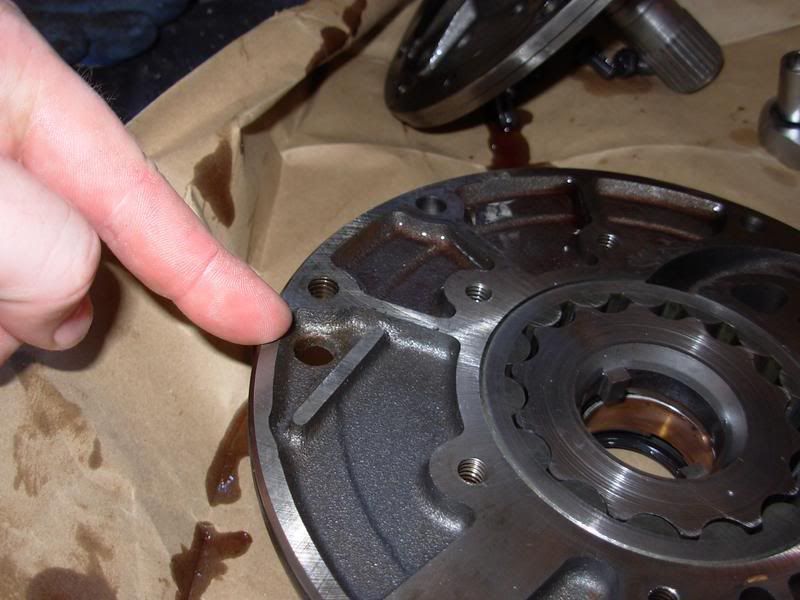
1. Here is a shot of the vent in it's original spot, just behind the torque converter (hole next to bolt, upper left)
![Image]()
2. All of the bolts are taken out of the pump housing and it is pulled forward. I tapped around the perimeter with a rubber mallet to get her loose. After the fact, I noticed that some of the holes were tapped so I could have used a puller. It work out just fine though.
![Image]()
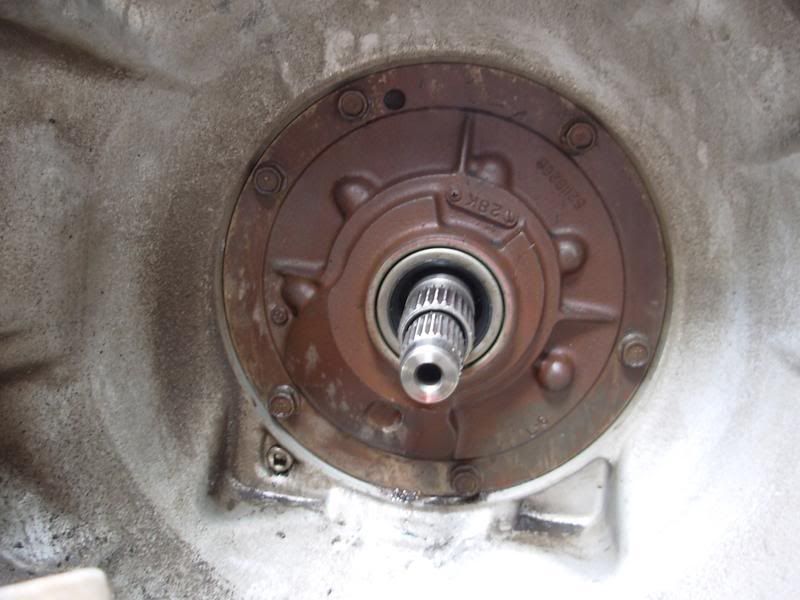
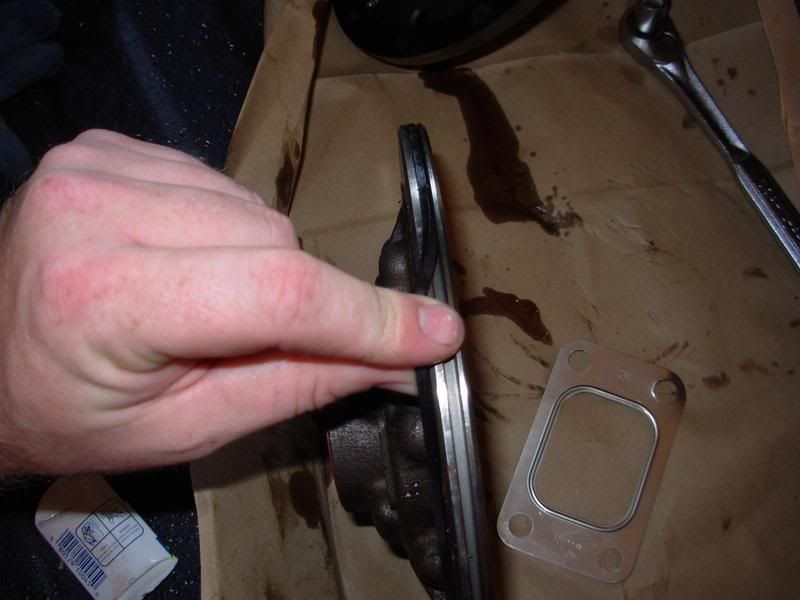
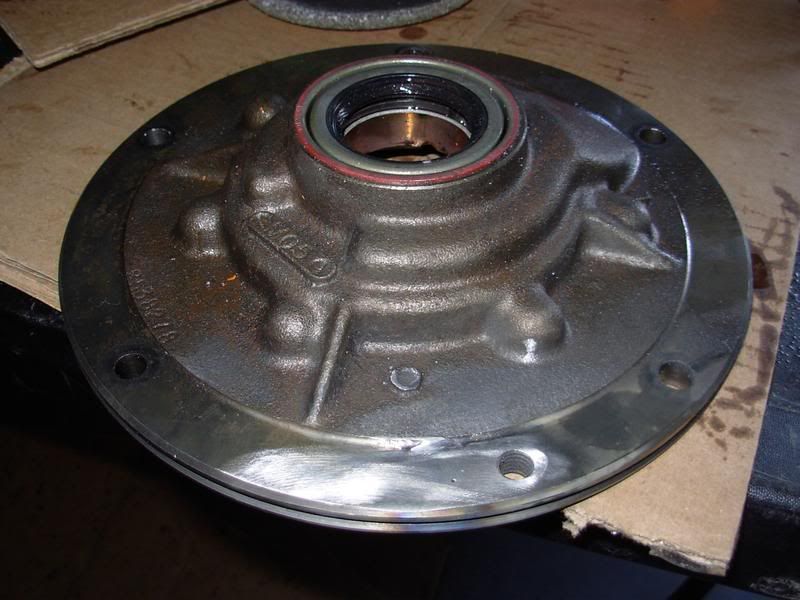
3. Here is a shot of the pump housing removed. Note that the center shaft stays behind and the outside splined tube comes out with the pump housing.
![Image]()
4. The housing then splits into two, exposing the vent hole. She is almost ready to be welded shut. Note the other half of the housing in the background of the picture.
![Image]()
5. Remove the outside rubber o-ring to avoid meltdown of it.
![Image]()
6. Shield the rest of the inside of the pump to keep weld spatter out. Just to clarify, this pump housing is made of cast iron, not aluminum (like the tranny case) so use steel welding wire.
![Image]()
7. For new-bee welders, make sure you pulse the wire feed as to avoid getting it too hot and causing a warp. I made a series of 3 welds and let it cool about a minute between each. Scratch off any dingle-berries (weld spatter) with a flat head screw driver. Keep the inside of the pump nice and clean of debris.
![Image]()
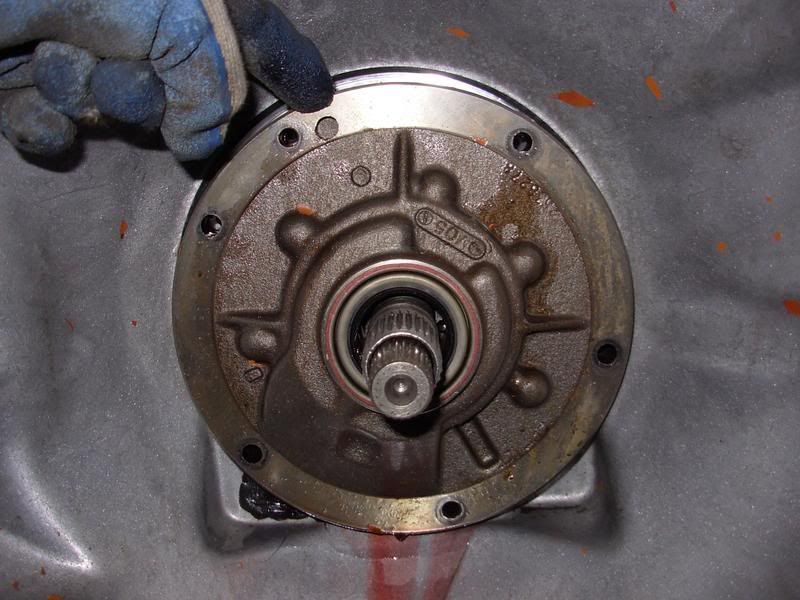
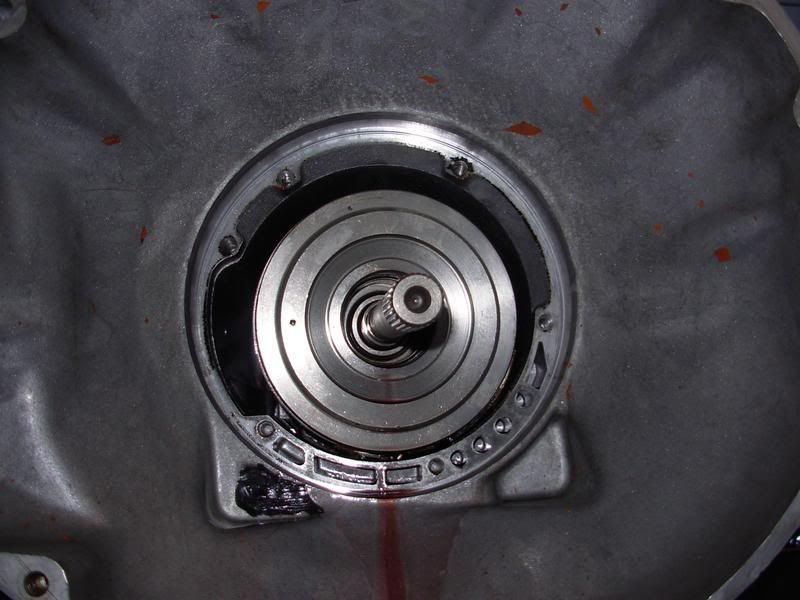
8. This is the front side after running a sanding disk over it to clean it up. After she cools down, reassemble the pump housing and put the o-ring back in place. Don't reinstall the pump housing yet.
![Image]()
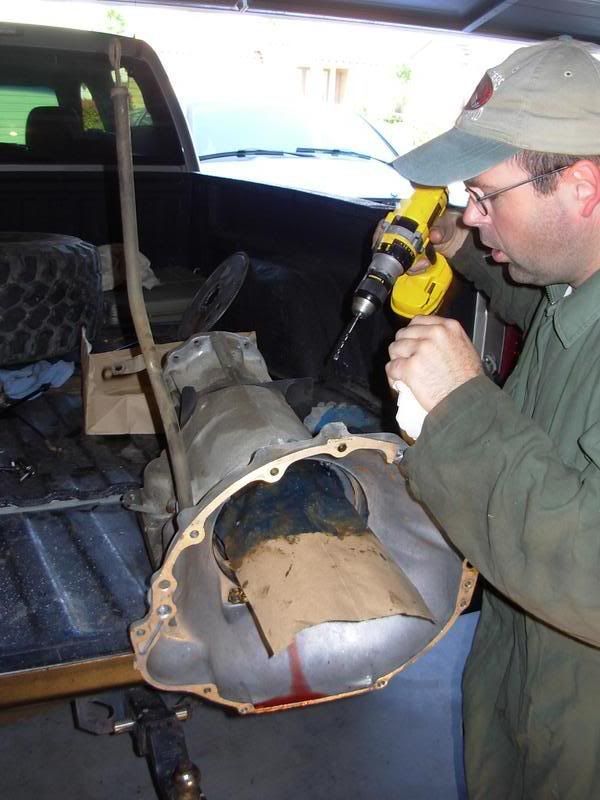
9. On to the new vent hole & breather tubing. This is a grocery bag covered in a thin layer of grease. It will catch all the aluminum shavings from the drilling and tapping that is to come.
![Image]()
10. Cut the bag down to a size that will slip into the top of the tranny like this.
![Image]()
The first reply should be the rest of this write up, only 10 images per post...
I hope this will help some of you guys out, I was searching all over the web for this info with pictures and never had any luck finding it. This is a write up of how to weld shut the famous "low vent hole" that kills the Jeep automatic transmission (caused from going too deep in the drink), and relocate it to the top of the tranny case. This tranny (TF999) is out of a 1989 YJ with the 6 banger. This will probably work on other trannies as well.
1. Here is a shot of the vent in it's original spot, just behind the torque converter (hole next to bolt, upper left)
2. All of the bolts are taken out of the pump housing and it is pulled forward. I tapped around the perimeter with a rubber mallet to get her loose. After the fact, I noticed that some of the holes were tapped so I could have used a puller. It work out just fine though.
3. Here is a shot of the pump housing removed. Note that the center shaft stays behind and the outside splined tube comes out with the pump housing.
4. The housing then splits into two, exposing the vent hole. She is almost ready to be welded shut. Note the other half of the housing in the background of the picture.
5. Remove the outside rubber o-ring to avoid meltdown of it.
6. Shield the rest of the inside of the pump to keep weld spatter out. Just to clarify, this pump housing is made of cast iron, not aluminum (like the tranny case) so use steel welding wire.
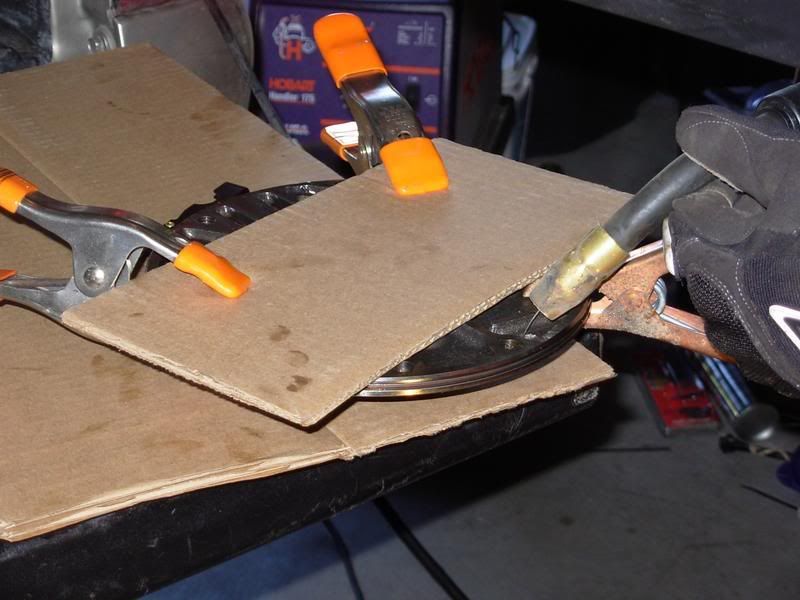
7. For new-bee welders, make sure you pulse the wire feed as to avoid getting it too hot and causing a warp. I made a series of 3 welds and let it cool about a minute between each. Scratch off any dingle-berries (weld spatter) with a flat head screw driver. Keep the inside of the pump nice and clean of debris.
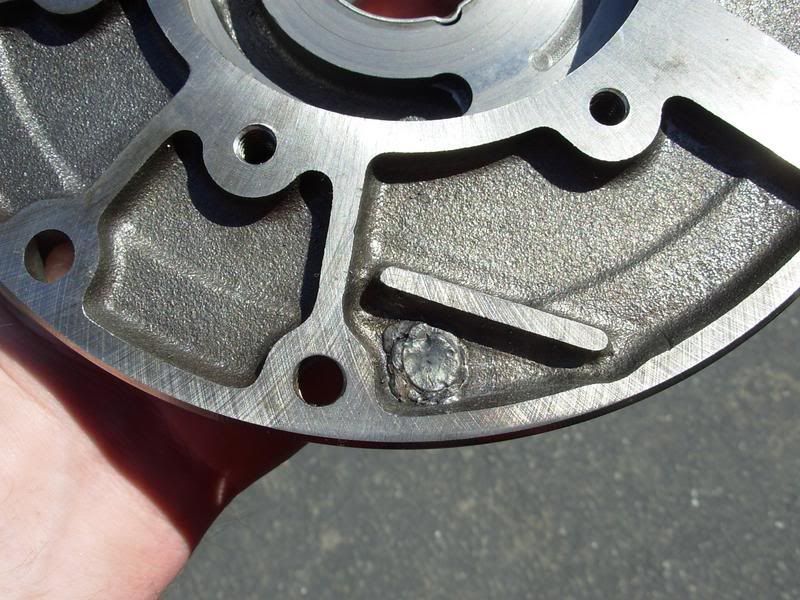
8. This is the front side after running a sanding disk over it to clean it up. After she cools down, reassemble the pump housing and put the o-ring back in place. Don't reinstall the pump housing yet.
9. On to the new vent hole & breather tubing. This is a grocery bag covered in a thin layer of grease. It will catch all the aluminum shavings from the drilling and tapping that is to come.
10. Cut the bag down to a size that will slip into the top of the tranny like this.
The first reply should be the rest of this write up, only 10 images per post...


 . AJ
. AJ